Due to overwhelming demand (well, one or two half hearted requests) I wrote a tutorial post for the smocking. This so exhausted my enthusiasm for counter change smocking that I left the smocked fabric I had made for the tutorial abandoned in my too hard pile instead of making the intended evening top to wear to a New Years Eve party.
I have a hectic social life, which mainly revolves around driving my daughters to their friends' houses. Nevertheless, I need an evening top by Saturday. My sparkly gold knit rayon with lycra knit from Gorgeous Fabrics seemed just the thing, particularly as I had already done half the work.
This time, I wanted the smocking to be on both the front and the back of the t shirt.
I had smocked further from the border of the fabric, so that I could use the unsmocked edge as a facing.
I draped the smocked edge around my dressform, and holding my breath, cut out an armhole at the right side, after pinning the pattern piece to the front for approximate placement (the pattern is t shirt 112 from Burda Style 08-2010).
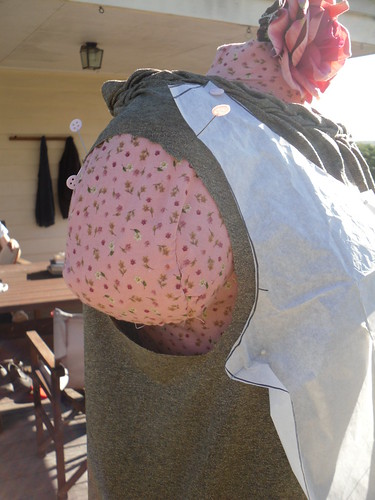
I marked the shoulders with pins, then lay the fabric flat and cut out the side seams and left armscye following the pattern and my original cutting.
I then returned the pieces to the dressform, and hand sewed the left shoulder seam across the smocking whilst the pieces were draped on the dressform. I sewed the remainder of the shoulder seam by machine. I used the walking foot, 3 step zig-zag at 1.0mm width and length, and a size 60 stretch needle. Sewing this fabric was still rather difficult, due to its incredible stretchiness, and tissue-like thickness.
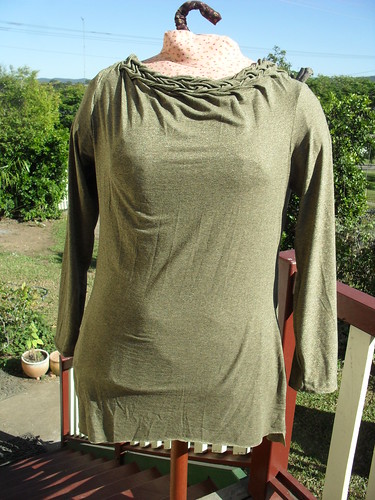
Front
As the fabric is so thin, I had cut out another layer of the fabric for the fronts and backs, intending to use this as an underlayer, and to sew the facing to the underlayer to keep the neckline in place. However, once I had sewn in the sleeves (one is inside out and backwards - the price of mid-week evening sewing, but I am not unpicking this fabric!) and tried on the t shirt, it seemed that the incredible stretchiness had made the t shirt around 8 sizes larger than the last time I used this pattern. (I am very glad that I orginally intended this t shirt to have a very high neckline). This new oversized style removed a lot of the clingy potential about which I was concerned, so now I also have a stretchy gold singlet that might be the base for this years New Year party oufit as well as this winter evening top. There is nothing like planning ahead ;)
I tacked the facing at the necklines to the outer fabric at some of the gathering points at the smocking, so that it is not visible from the outside.
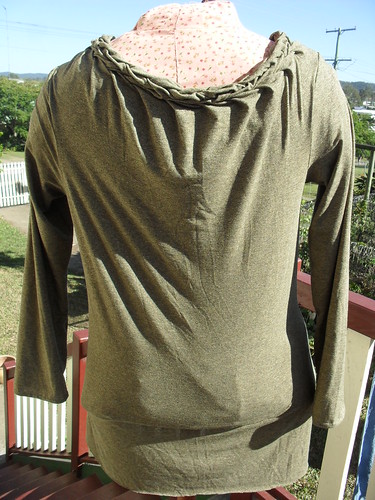
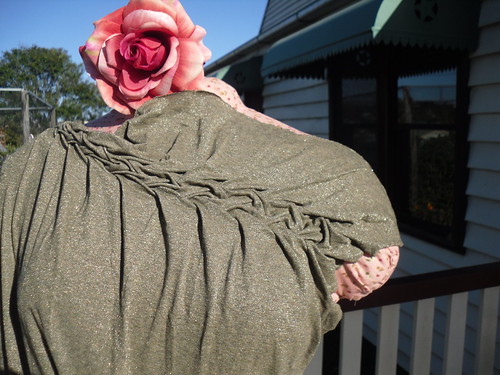
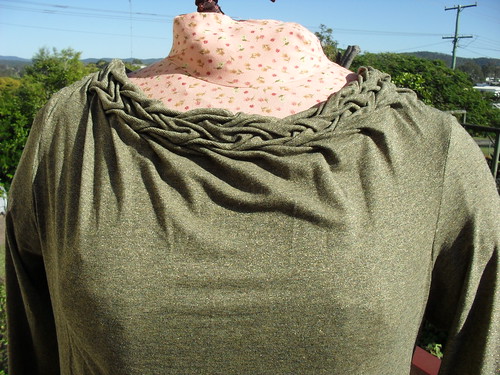
Back
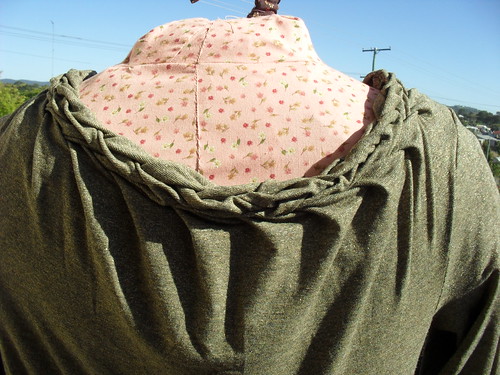
The back has a cowl effect that I quite like.
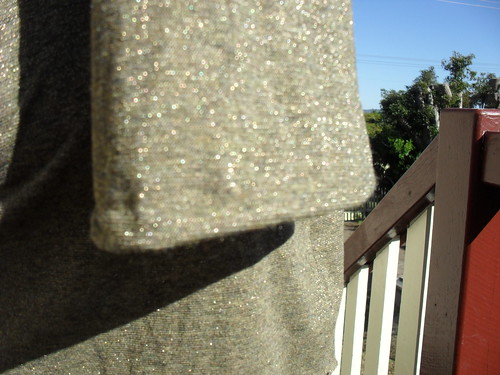
I finished the sleeve hems by hand, using catch-stitch, as I wanted a very narrow hem and did not trust this fabric under the coverstitch. I did not finish the hem at the body, as the top is almost dress length, but I will be wearing it tucked in. It is now an evening top with built in petticoat!
14 comments:
OOh, that so so pretty!!! I want to see it on you! :D
You know, I first noticed this smocking in a RTW top many moons ago. Within a month or two, you posted your top. One of these days, I want to try this! I will look at your tutorial when I do. :)
This is very lovely. Enjoy feeling glamorous on your night out!
-Sewingelle
Oh, we need to see this one on you. Make sure that the camera is handy when you are all dressed up and ready to go.
Wow what a gorgeous top and will be perfect for your evening out. As the others have said, must see it on you.
Gorgeous, and very glam on the dummy, but I echo the need to see this worn by you!! I've a feeling you will really make it shine...
Wishing you a wonderful evening out!
It's really pretty, especially with the slight sheen to the fabric. You are a brave woman to cut fabric like that.
That looks all very clever. Way a great way to give a top a real feature without having to add trims.
Wow. You smock really well. It's so effective. Thank you for the details too. And you'll post up the night out pic too
yes please a dressed up photo would be good.
Wow! Beautifully done! I'm sure you will really enjoy wearing it.
Beautiful and you are so fearless! I was one of the tutorial requesters and admit I have done no more than read it occasionally. Sorry about that. Smocking requires so much precision, which is not my strong suit!
Beautiful neckline, the smocking really makes it stand out.
gorgeous gorgeous gorgeous gorgeous gorgeous.
will you make me one? :)
So very pretty! I love your smocking; keep it coming!
Post a Comment