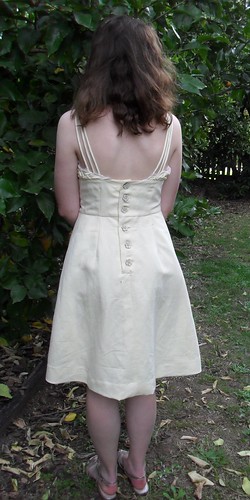
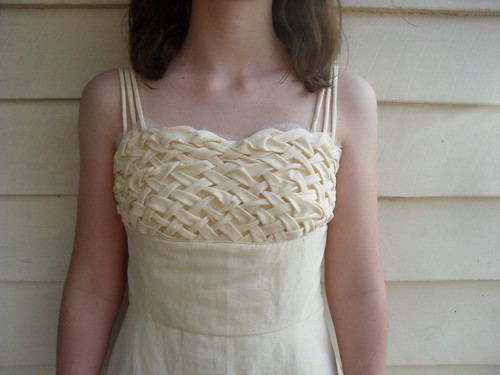
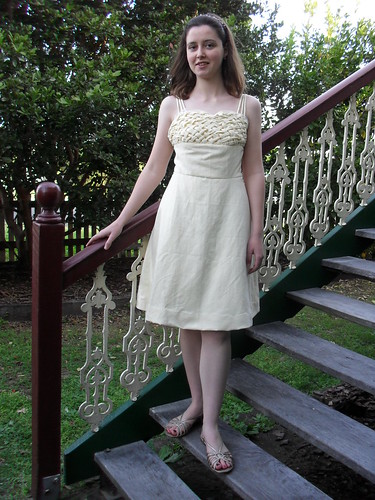
Sometimes, when you sew, the outcome is even better than you imagined.Despite the difficulty in photographing this dress (too pale to show the details in most lights), I feel that this is one of my most successful projects. I am feeling immune to Isewedititis - bring on the chiffon.
If you see the faults in this dress (don't look too close), please don't tell me ;). I can see a few from here but am pretending they are not visible.
There are 27 hours of
work highly enjoyable smocking and sewing time in this dress and I feel that it is worth every moment. I think my daughter has excellent design skills.
I do hope that my daughter will get 27 hours of wear from this dress, (
yes, I do read Barbara Eumondi in Australian Stitches) but have taken my full reward for making this dress in my pleasure in the construction. This is just as well, as my daughter is more likely to wear jeans than this dress, but I can probably still
make convince her to wear it out to lunch with her Grandmother or similar occasions ;). She is a kind girl, and will do this to please her mother if I look sufficiently miserable when I
beg ask.
I also hope that the formal version is equally as pleasing when I get around to making it. I may have to give up sewing so that I can rest on my laurels. ( On considered reflection,that chiffon can return to the stash)
(
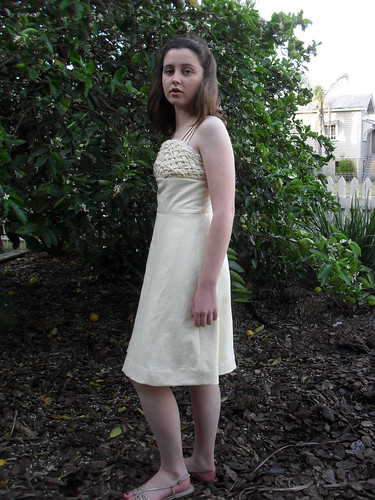
This is the trial version, in day wear style, of my daughter's Yr12 formal dress - although after reading the stories around Promaballoona, I am considering suggesting to my daughter than she stay home and have a nice evening doing some knitting instead of going to her formal)
If you can bear more construction details, my variations to the pattern, Vogue Vintage 8812 are below.
The fabrics used are medium weight linen from Michaels Fabrics, with cotton batiste lining. Silk organza is used, on the bias, for the edging on the lattice smocked overlay. I used a small amount of very crisp shirting interfacing from Sew Exciting Sewing supplies for the button placket.
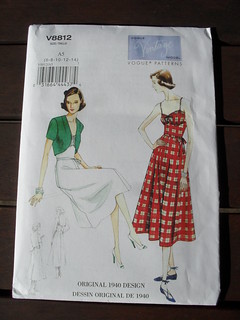
Alterations and contruction changes
1. Small bust adjustment to the "bra stay", and constructing both a lining and fashion fabric piece from the stay patten to support the smocking.
2. Lattice smocking of the upper bodice overlay, (my post with instructions in lattice smocking is
here) and draping of this piece with the selvage as the upper edge, omitting the bias finish and centre bow of the overlay in the original pattern.
After construction, I needed to gather the overlay section under the arm and to the back slightly to prevent puffiness in this area.

Puffiness in the front was considered figure enhancement, and gently shaped with a little central tacking to the lining.
I also altered the upper bodice overlay and the waist section by omitting the under bust concavities in the waist section, and in the overlay, reduced the upper central concavity, as the smocked overlay attachment would have made the curved seam less noticeable as a design feature, and would have been more difficult to sew than the gentle curves remaining in the seam.
3. Piping the under bust seam. This was quite tricky, as the invisible zipper foot I commonly use to apply piping with my Janome kept catching on the lattice smocking. (I have a piping foot for my old machine, but I don't think this would work any more easily, lattice smocked mid weight linen is not terribly co-operative in construction)
4. Using 3 bias tubes with the inner and outer tubes tapering from the bodice to the shoulder to form the shoulder straps rather than one wider bias strap. These are sewn together at the shoulders. This is a detail taken from a RTW dress my daughter was given when she was 4 (a dress from Paris, as a present from Grandma), I have used it several times in dresses where a bra is not required, as it is simple to sew, and looks more fancy than a spaghetti strap.
5. Using a right sides together construction for the bodice and waist seams rather than the 1940's era construction method of folding in the seam allowance and lapping the waist piece over the bodice and skirt.

5. Fully lining the dress with cotton batiste and finishing the lining hem with cotton lace.
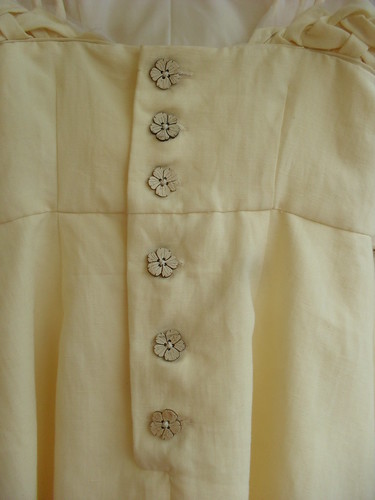
6. Using machine button holes rather than the bound buttonholes in the pattern. I am rather taken with these flower shaped coconut buttons, they look so pretty next to the butter shade of the linen.
7. Omitting the belt
8. Shortening the dress by 15cm at the hem to a just above the knee length.
Excuse me, I am off to hang this dress on the wall in my sewing room so that I can admire it a bit more.