Warning - very photo heavy post.
Whilst I was discussing sewing in person with Elizabeth, my need for a dress form became apparent to my husband. I am not sure if he met Elizabeth's dress form, Maude, but he certainly heard about her useful attributes. This is the sort of information that is hard to avoid when you hang around 4 sewing obsessed people for several days.
Shortly after we returned home, very late one Friday evening, he suddenly announced that he was prepared to start taping. I admit, readers, that I was not very keen. On Friday evenings, after the children are in bed, I like to drink a glass or two of red wine whilst either reading, surfing sewing blogs, or maybe doing a little mindless knitting or hand sewing. Standing up with my stomach held in for a couple of hours was not high on my agenda. However, as I had asked him to help me with this about 2 years previously, I thought I should leap at the chance. I was very grateful, but unfortunately not very well organized.
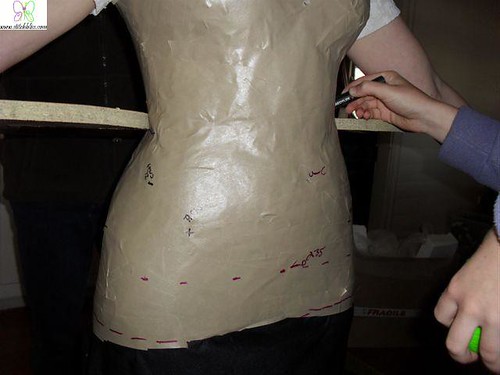
We used a layer of duct tape over an old t shirt and old cycling knicks, followed by 3 layers of pre-gummed paper tape from the framing shop. We used the duct tape first as it is a little stretchy, and we wanted to compress the t shirt fabric before using the paper tape. My husband is very good at taping, having taped up hundreds of sprained ankles and unstable shoulders in the course of his work, so it took about 90 minutes, with lots of short and shaped pieces where curving was required. Unfortunately for my vanity, I was not able to hold in my stomach for this long.
Before removing the taped form, by slicing it up the back, he marked bony anatomical points - tip of the shoulders, collarbones, anterior and posterior iliac crests (hip bones). We used bony landmarks because it was too late in the evening to finish the entire job, and we felt that replacing the form to match bony landmarks would be more accurate than trying to match landmarks over softer tissue at the classic sewing references at waist, and mid hip . We were lucky that we had chosen this method, as when we removed the form, it was not stiff. The shape changed considerably on removal, and we realized that we needed another layer of paper tape - which I did not have.

The pre-dress form was hung up on a coat hanger - theoretically overnight but actually for the next few days whilst supplies were gathered, and my husband made some tools to improve the outcome. I am very lucky that he likes woodwork.
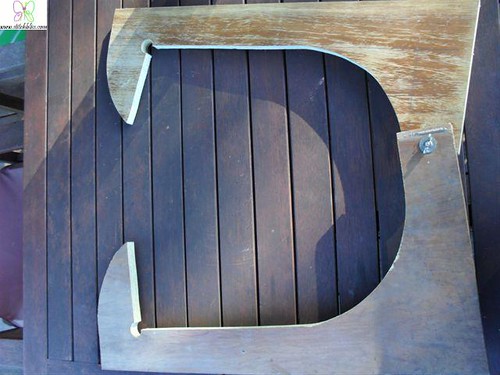
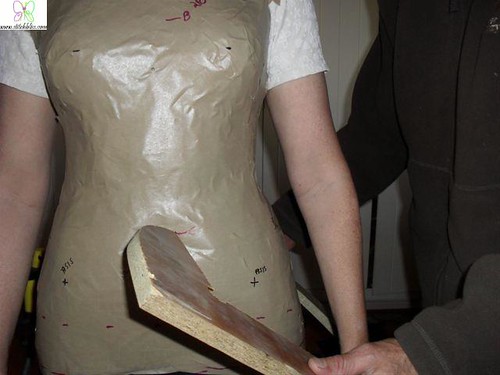
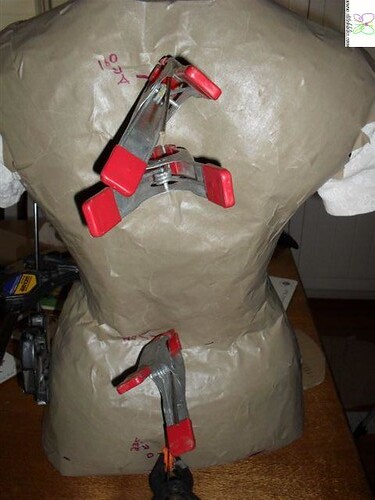
Noticing the tendency of the form to distort in the median and sagittal planes, he made simple super-size calipers to take width and depth measurements of the reapplied and re-taped form. The points at which these measurements were taken were marked on the form by my daughter as my husband took the measurements. The waistline, hip line and bust lines were also marked.
Before the removal of the form, he used a laser level to mark the bottom of the form parallel from the floor.

After the form was removed, the form was pierced with wire at the measurement points. Originally this was quite difficult, but we found that heating the wire first allowed the wire to be pushed through the tape and underlying t shirt without distorting the form.

Each wire was hooked at one end, and clamped at the other to the original measurement at that point.
We made a mistake here, sitting the form on a table - this made the backside too flat, and it was difficult to reshape at this point.
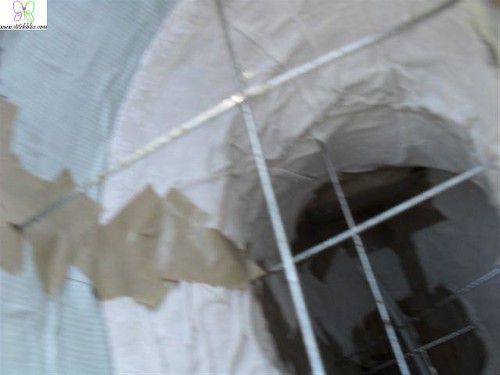
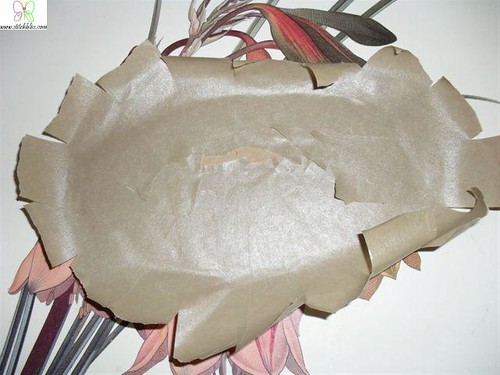
I then made a seal for the armholes and neck hole, using cardboard and tape, and applied these from the inside of the form.
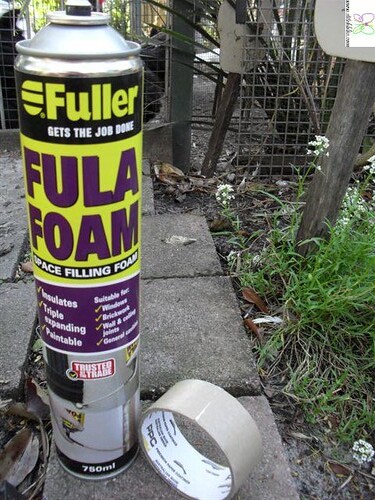
The pre-form was hung by a central wire, upside down, on the washing line. We used one 750ml can of filler foam, but found after an hour, that the form was only about 1/3 full, so I bought 2 more cans.

Unfortunately, 3 cans was a bit too much. This is what the form looked like 4 hours later.
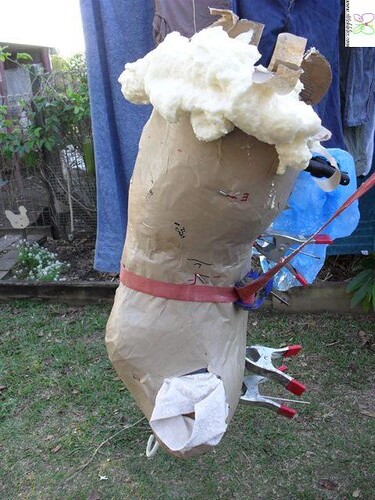
I was rather disappointed. However, after trimming off the excess foam, we found that the dressform was not too much bigger than me to prove partially useful. Using the wires and clamps had worked quite well, and the dressform has distinct similarities to my shape.
Next post I will describe the construction of the cover and stand.
13 comments:
Wowee, Karen! What a painstaking and involved process. I don't think I'm up to it, but I can see it will result in a very useful tool for you!!
I love how it's become a family project. :D
What a lovely hubby! And what a LOT of faffing about, lets hope it IS useful when done.
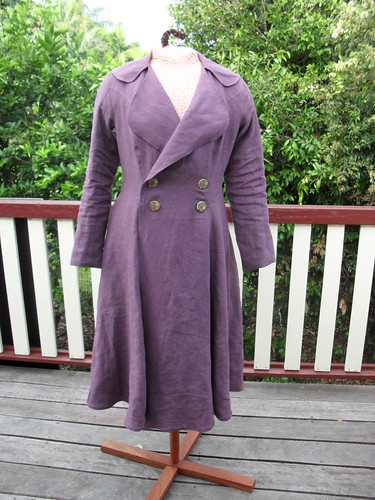
You and your husband are so funny! I like how you don't mention the finished coat AT ALL. I'm not sure I like you any more.
Your fitting dummy will be your best friend. What will you call her? Why did you fill it with foam when paper tape forms are rigid? Just curious.
Wow! Your hubby is amazing! Now I know why my duct tape double didn't make me happy.... No giant calipers. That really was a stroke of genius, as was the wire infrastructure.
wow what a clever husband he is! And so resourceful!
I am so impressed! Hubby is inventive. My DH helped me make a duct tape dummy a few years ago and we put lot of effort into it. Our version was a wadder, but it is certainly good for some laughs.
How fun that you did this together with the rest of the family. And wow, that's quite the project. I look forward to see how it turns out!
Karen,
How cute that your husband and your daughter got in on the action. What a great idea to use wires to keep the form in the right shape. I have not heard good things about duct tape forms, but I think yours is going to work. I can't wait to read the rest of your posts about the finishing touches.
...and when do we get to hear about your coat???
;)Deb M.
I find my duct tape dress form very handy for pinfitting patterns to see if alterations will be required. Hopefully you will use yours a lot too. I chuckled at some of the things you did to keep the shape on the dress forms. The wires were clever, and probably a good idea when filling a form with expanding foam.
How nice to have a practical husband! The bloke I have is only good for mowing the lawn and I don't care if it never gets cut. Your coat is gorgeous!
Goodness me - you both win the prize for persistence and general awesomeness!
WOW, amazing. I have to confess the last picture made me laugh, so funny with the foam bursting out not unlike a solidified schooner of beer, and what's with the picture of you getting "stabbed" in the midriff with a large nasty looking wooden sword?!
Joking aside; well done, a really magnificent effort, and you'll find it so useful. Will you name her?
I love the solutions your DH came up with to get the shape back and keep it, well done. She may not be perfect but will be a lot better than any shop form you can purchase here in Australia.
I use Isabel (my duct tape form) constantly and wouldn't part with her for any money.
Is your coat finished?
Post a Comment