Having risen well before dawn this morning, I have some very early morning photographs to show you (outfit accessorized with large bags under the eyes), and am keen to return to considering light and frivolous matters such as personal adornment and hobby sewing, particularly as I have most of the day left for these matters.
During the week, when I showed an enormous pile of mending to my mojo,it whimpered and tried to hide under the bed, so I

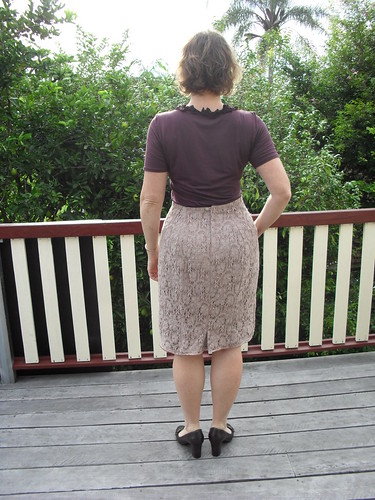
I used my workhorse pattern BurdaStyle 02-2011-107 (adjusted) despite its front darts and 4 back seams. Although lace is better used in a pattern with little shaping and seaming, my figure does not agree with this sort of pattern.

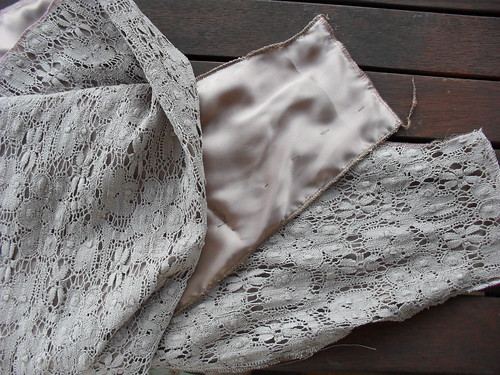
To deal with the instability of the lace, and to conceal the seams , I decided to treat the lace and the sand washed silk charmeuse as a single layer in construction. I lay out each fabric on cutting mats, and cut out with a rotary cutter, giving generous seam allowances to allow for bulky seams and fitting( 2.5cm) and a 3.75 centre back seam allowance to allow for an off set lapped zip and a back kickpleat.
I hand basted the centre back stitching line and the darts. I overlocked the edges of each piece, then machine basted the garment for fitting.
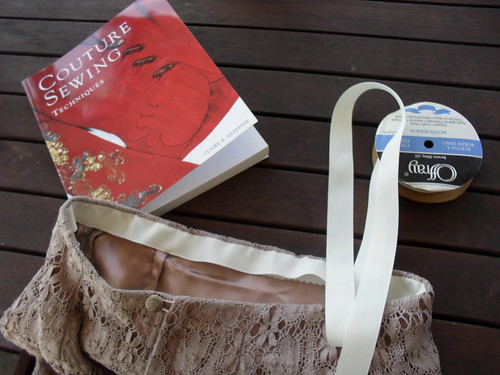
I used the off set lapped zip instructions from Kenneth King's book, Cool Couture, which although straightforward and giving a nice result, unfortunately assume there is a waistband at the top. Having no waistband, and some issues with my previous waist finishing explorations with this skirt, I looked up skirts in Claire Sheffer's book Couture Sewing Techniques book. She describes 3 common waistband finishes. The one that appealed most to me for this skirt was what she describes as a faced waistline, "favoured by Chanel".
I did not find the instructions entirely clear, more a general description assuming quite a bit of knowledge. The first step, fitting the skirt closely to the waist is fine. I did not see though, how I could apply a stay tape to the waistline of the skirt, as instructed, without the stitching showing through the outside - unlike the other steps, no stitch advice was given for this step.
Instead, I applied the stay tape (selvage from quilting cotton) to the "raw" top overlocked waist edge,by machine, which is probably incorrect, but worked for me. I interfaced the waistline as instructed, guessing a width of about 2.5cm would be appropriate, as there are no guidelines in the book. I used Pro Weft Supreme interfacing from Fashion Sewing supplies, as this is an excellent firm interfacing, with sufficient texture for the next step, catchstitching the seam allowance to the interfacing, to be carried out without needing to take the stitch through to the outer fabric.
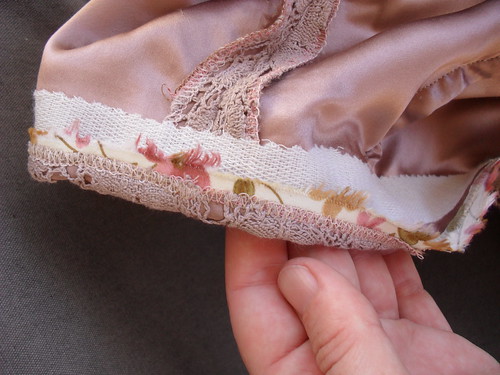
Following these steps, (during which I folded the seam allowance over the zip tape and hand sewed in place) a grosgrain ribbon, steamed or clipped to shape, is applied over the top of the interfacing and seam allowance, and fell stitched ( a new stitch to me) in place at the top only.
I also attached the bottom of the grosgrain (I used 7/8 inch grosgrain,no indications re width
are given in the book)

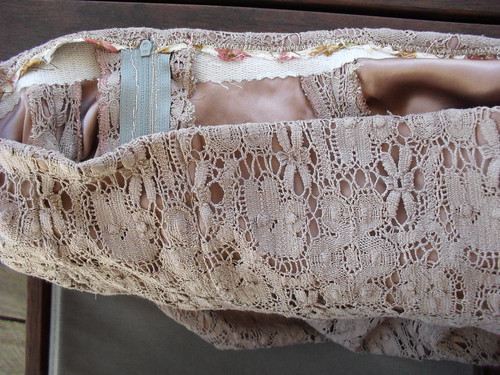
There are no instructions for finishing the grosgrain ribbon band, but a sketch showing buttonloops. I used hooks and eyes set up like a bra back fastening, as I was happy that I would be able to fasten this in the small of my back by feel, rather than having to request assistance in dressing.
I had also applied a thread loop and button externally at the top of the zip, as I like the zip placket to sit flat in all circumstances, but due to the excellent firmness given to the waistband by this multi-layer finish, I do not think it is really necessary. I particularly like this waist finish, and will be using it again. The grosgrain seems to lightly grip the tucked in top garment in addition to keeping the waist firm.
After all this success with the waist, I had still not decided how to hem this piece. Lace finishing techniques all seem to assume that cut lace does not ravel, which is not the case for this fabric (maybe it is home dec lace?, and I did not want an overlocked edge at the hem, as this looked cheap and sloppy in my sample.
My eventual solution was to separate the lace and silk underlay for about 5cm at the bottom of the skirt, and to bind the hem with a straight grain strip of the underlay silk charmeuse. I tried bias, but it rippled. I machine stitched the right sides of the garment and charmeuse together at the hem line, then turned under the charmeuse and hand stitched the folded edge of the charmeuse to the stitching line. The lace had stretched a little during the machine stitching of the hem and I took small pleats in the charmeuse binding at each seamline to preserve the slight pegging of the design. I was not entirely successful in preserving the pegging, but have ended up with a straight skirt that is not unpleasing.
I hand stitched the vertical skirt seams of the lace and silk skirts and made a hand rolled hem of the inner silk skirt.
I am pretty sure that this skirt will work well in my wardrobe.
Edited to fix the spacing, thanks to Mary Nanna for the instructions!
20 comments:
Really gorgeous skirt!
It sounds like you had a few challenges with this skirt, but looks like you've now mastered some new techniques - and what a beautiful, well fitting skirt you now have!
I will have to come back to reread your waist stay info next time I want to make a skirt without a waistband. Usually I just add a waistband to make it easier!
I think this lace skirt will be a great addition to your wardrobe. You did a great job working out how to do the finishing.
This is a very lovely skirt and goes nicely with the top you have chosen. Funny what sparks the mojo...you obviously need a technical challenge to get you going!
So pretty! Thanks for showing how you used the waist-stay to create a pretty finish on the inside. It's a good idea.
Lovely skirt. Thanks for sharing the details how you made the waistline.
From the first picture, I could see this was a lovely piece of work. Congratulations on making such a lovely skirt. It's a beautiful piece. You worked throught the challenges so well.
What beautiful skirt! I love lace in slightly odd colors.
Well done!!!
Really lovely skirt. When you have a TNT skirt pattern that fits that well, it is a must to use, no matter what the fabric.
It's lovely! And a wonderful job putting it together, I really like how you did the waist. I've got a faced bias skirt that I took apart last fall because it was literally falling off, and this method looks like it'll solve that!
Well all your technique interpretations have ended well with a very pretty , shapely skirt. you obviously like a challenge.
Truly beautiful skirt! I am guessing you will find 100 ways to wear it.
Your fabric was right! It's always good to listen to it. The skirt is beautiful and I do hope you get to use it often as it also sounds like it was a real time investment.
Re the new blogger interface: to get it to space correctly when you select "new post" you need to ensure you are in "compose" mode not "html" mode. Click the tab in the far right corner. You should be able to edit this post to fix it, if it bothers you.
Your skirt is lovely. I am loving lace at the moment but unsure how I can make it work in my wardrobe.
Gorgeous skirt and another one thanking you for the waist stay information.
It's great, elegant and sophisticated. Thanks for posting all the details about finishing the waist.
Also stash petting is a brilliant phrase!
I love this skirt, really lovely lace and a great, great colour. What a fabulous fit! I also like it with the top you have on.
Beautiful skirt. I love to read about the fabrics from that trip getting made up into garments!
Such a nice looking and fabulous fitted skirt!
Post a Comment