This issue of BurdaStyle has * dresses themed "The Roaring 20's".All without waist shaping and most with skirt hems at an unflattering level for me.In fact I remember my daughters and I being highly entertained by this issue in a what-were-they-thinking-these-are-HIDEOUS sort of way. However, my daughter decided to have a 1920's theme for her 21st birthday party and all of a sudden this issue became incredibly useful. I eat my words.
Fortunately for me, one of the dresses in this selection is really interesting to sew.
This pattern is marked as 3 dots, "expert". I therefore approached the construction with some trepidation.
As it turned out, this trepidation was not necessary. I found the garment required precision cutting and marking, but was relatively straightforward to sew and was quite quick to construct, having no fastenings and a very neat neckline and armscye finish.
According to my measurements, I traced out a size 38 pattern then altered the tracing to a 42 at the back hips and a 40 at the front hips. This required some wrestling with the transition of sizes at the side panels to have matching seamlines, and in the end was probably not necessary, as there is a lot of ease at the hips due to the bias cut. This very useful blog post demonstrates this issue, but as the fabric was not the same as mine (polyester vs rayon) I felt it was better to be safe than to have a garment failure in this region.
I did not include my usual FBA and there is no bust line pulling. (1" usual adjustment). I did not include my usual narrow back adjustment, and there is some draping at the back neckline which I minimized by using lingerie keepers at the shoulders. I squared the shoulders slightly by 1/4", usually I square by 3/8" but the shoulder seams in this dress are very short.
My other addition to the pattern was to use self fabric, cut on the cross grain, instead of interfacing the back neck and armscye facing/lining piece.
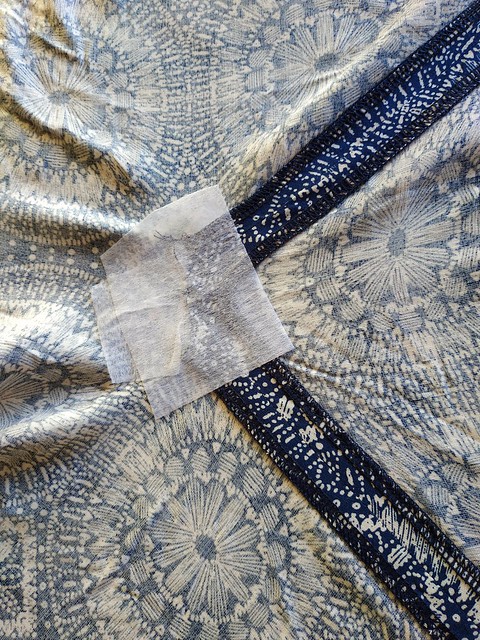
The most tricky parts to sew were the side inserts, which involve turning an acute angle where the dropped skirt section meets the side panel. I used a walking foot to help minimise grain distortion whilst constructing. Burda gives quite good instructions for sewing these seams, advising that the fabric be reinforced with interfacing prior to cutting to the marking point. I did this, and applied a second piece of interfacing after finishing the seams on the overlocker, as I was not able to overlock the seams right to the point.
The other slightly tricky part was the finishing of the armscyes. Burda instructs you to turn in the seam allowance of the armscye and lining, pin it, then pull the facing through to the wrong side.
I had difficulty doing this, as I could not see to line up the shoulder seams.
Instead I started with the majority of the garment turned to the right side, but turned the armscye front section so that I could sew the right sides of the armscye and lining together from the wrong sides up to the shoulder, turned the garment out to the right side at that secction, and repeated for the back section of the armscye. This worked perfectly and due to the earlier precision cutting and marking there was no pulling of the lining to distort the fall of the garment. I did try to photograph this, but the photograph looks like a wrinkled pile of fabric.
An alternative finish is shown at this very nice review of the pattern.
Although Burda says to leave the hem unfinished, I cannot cope with unfinished hems and used a fine rolled hem which did not adversely affect the swing of the skirt.
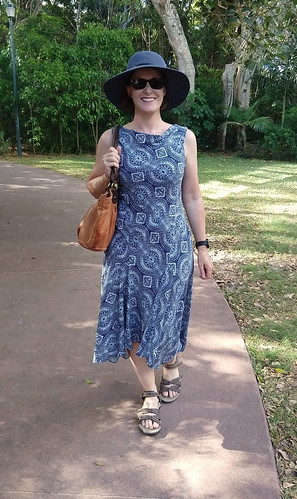
Here is my trial version. I did not make a toile as the drape and bias cut of the fabric would not be replicated by a dissimilar fabric. This is a woven rayon from Lincraft, and is now a drapey dress to be worn on very hot days.You can see it here on location last summer (Did I mention that I am not up to date with blogging?
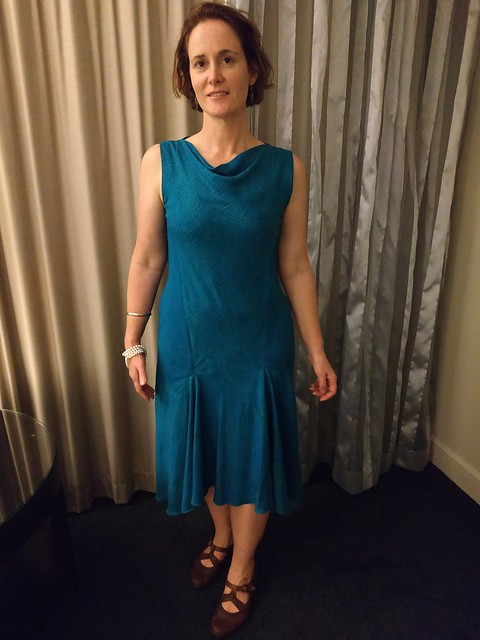
The party dress is from a woven rayon from StoneMountain Daughter. I love the print, which is of raindrops and gives a slight emphasis to the directional panels. This is now a slightly more smart drapey dress to be worn on very hot days. It is seen here after the party, unfortunately without the headpiece and faux pearl accessories.
I took in the side seams on both dresses to give some slight waistshaping which I find more flattering. As I am short waisted, the points of the hem godets are below hip level, which I think is more visually appealing than the level shown in the magazine. The dresses have a slight tendency to cling with is easily fixed with shapewear (for the party) or a petticoat for real life in a hot climate.
Overall I am very happy with these dresses. The party costume was true to the theme without looking ridiculous and I have two wearable garments after a highly entertaining sewing project.


4 comments:
Absolutely lovely!
These are beautiful! It's so good to see a post from you. I miss your entertaining and very informative sewing stories.
Fabulous dresses. The print makes the trial dress look much more modern. Or maybe it is the way you styled the two dresses. Thanks for sharing this interesting make with us.
Beautiful dresses. I'm hopeless at judging burda patterns by their line drawings and as you say the photos too! I'm about to go look for this issue online to check it out.
Post a Comment