Showing posts with label costumes. Show all posts

Friday, 22 February 2013

Faux tutu skirt

In our town, school swimming carnivals are a big deal. All the students dress up for them, in their House colours. My daughter has moved schools this year, for Yr11 and 12 subject choices, and her new House has the excellent colour purple.
SDC10719 
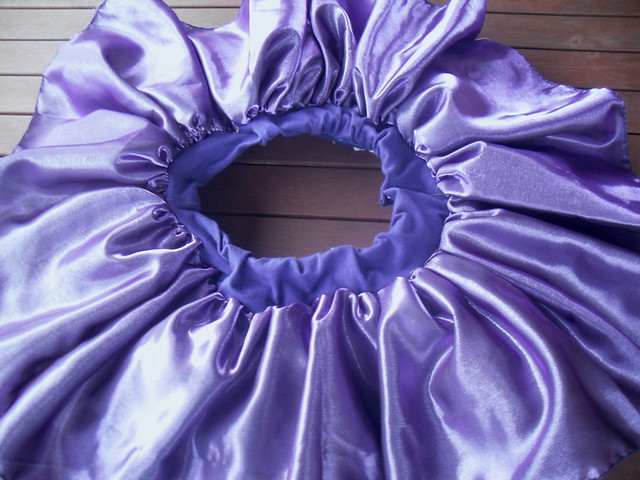
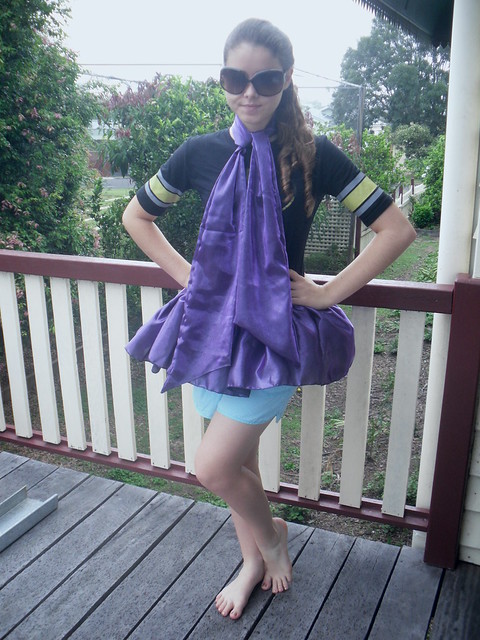
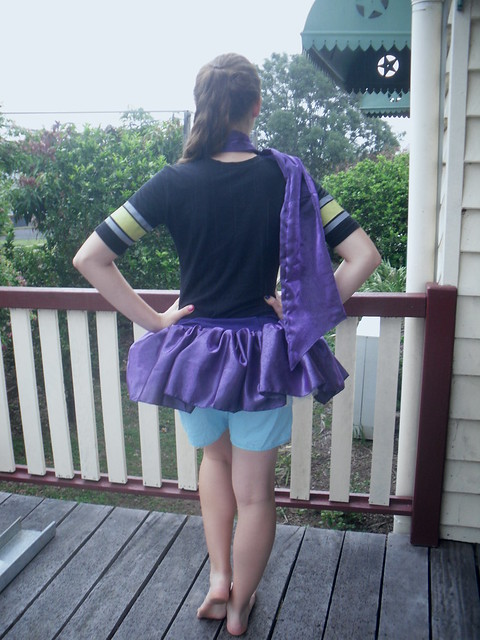
 Here is her costume for the swimming carnival. It was an efficient stashbuster, straight from the dressing up collection, circa 1999 poly satin with rainbow poly chiffon 2005 and bridal tulle 2012 formal gown remnant underlayers. 
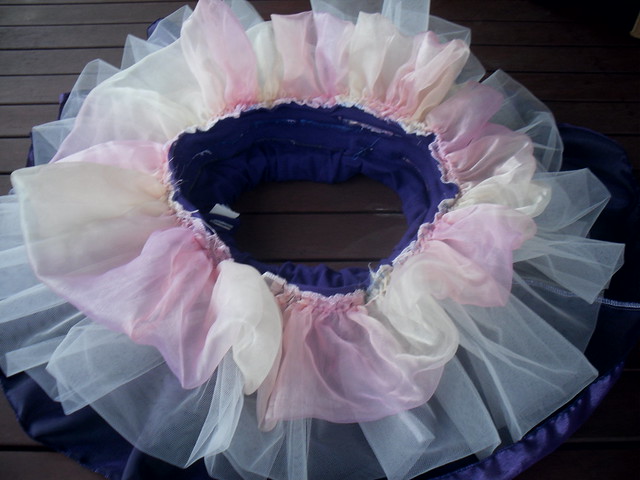
Naturally a costume for the swimming carnival has to be easy to remove for the actual swimming, so a real tutu would not be suitable. However, daughter the second was very keen to have a throughly sticking out tutu, rather than the easier to construct romantic style. Never having made a sticky-out tutu before, I inspected her old purchased dance costumes with new interest (with only slight internal grumbling that these did not include a purple version). These are made with many layers of different thicknesses of tulle from the hip to the waist of a leotard, and rely heavily on the close fitting nature of the leotard to stay in place, so I knew I could not replicate them precisely. 
My quick and rough version was to make a tube from cotton lycra that extended from the waist to the hips, snug over the hips and with an elastic casing at the waist to draw in the band. I applied 3 layers of gathered fabric to the band, the first a doubled over poly chiffon, the second, doubled over bridal tulle, and the final layer the eye striking purple poly satin. Each layer is applied so that the gathered wrong side supports the underneath of the skirt, effectively doubling the pouf factor of each layer. By doing this, I have managed 7 layers of gathered fabric at the central tube with only 3 episodes of wrestling with dental floss gathering. I pat myself on the back a bit for this, as gathering polyester is one of my least favourite sewing activities. The poly satin is hemmed using my overlocker, to make the hem very quick light SDC10727 SDC10728 With the remaining polysatin, I made an extra long ribbon/sash, with bias ends. We had intended this as a giant hair bow, but my daughter loved the 50's vibe of using this as a scarf instead.Her new friends greatly admired her outfit. SDC10722 
Costume sewing is very rewarding!

Sunday, 21 August 2011

Costumes: RTW cop out and Burda Style 11-2009-143 variation

I quite like making costumes.There is nothing like a dress up party or book week for making the seamstress mother feel quite superior. There are also no indications for couture techniques on a costume.
However, when I was walking past a dress shop on my way to the bank on Friday, a RTW dress on the pavement sale rack caught my eye.
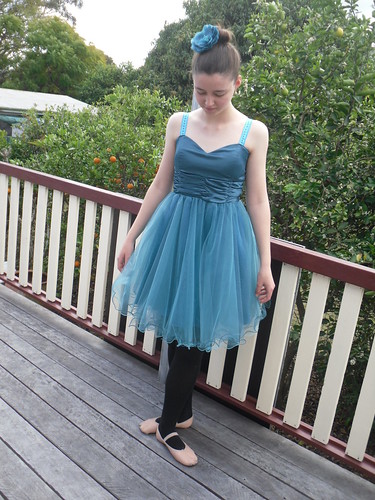
Does this dress look like a ballet costume to you?
SDC10197 My daughter has a solo in her concert.(She will not be wearing her black wool school uniform tights for the ballet concert) She threatened to model this with hiking boots when I asked her if she could put on her ballet tights for the photo, so I thought it better to just be grateful for the modelling despite the incongruous tights.

The dress was $35, and far too big, but I could not buy the 9m of tulle in the 3 layer skirt for $35 locally, let alone the other fabric.
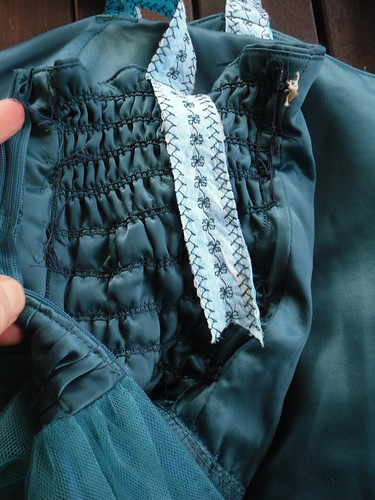
I added shirring elastic to the back, rather haphazardly, reminding myself that this was a costume when I thought about unpicking, and added ribbon straps for the exercitations of dance and the slender bosom of the dancer.
SDC10210
Inside view of shirring.

I did not have the right colour ribbon, so added decorative machine stitches to the ribbon using thread that matched the dress.
She is quite pleased with it. Although I usually loathe and avoid alterations, I am glad I did not try making it from scratch.
Next up, was book week at the primary school. Due to the retirement of a wonderful teacher, who used to run every fun thing at school, my childrens' school has not celebrated book week for 5 years, putting rather a dampner on my costume sewing showing off. Last week, the newsletter finally announced that a book week parade would be re-introduced, and the requirement was to dress as a character from another country. Naturally I assumed that this character would be from a book. I quizzed my son "Which character will you be ?" He said, "a farmer from Mulan, Mulan is from China and I have a sword from China". I pointed out that Mulan was a Disney movie, and suggested that he dress as a character from the Dragon Keeper series, set in ancient China, which we have just finished reading together. My son was quite exasperated. "If I dress as a book character, no one in my class will know who I am!". Obviously, I am out of touch with book week.
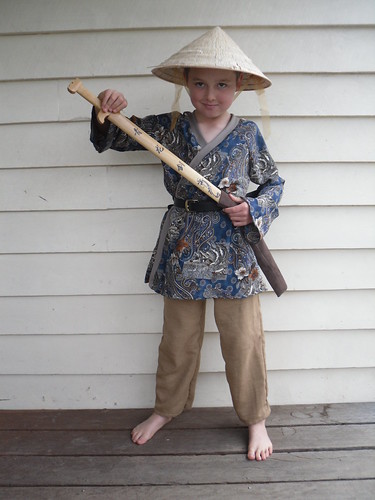
Here is our Chinese farmer turned Mulan's soldier.
SDC10208
Apparently a weapon is a requirement for dress ups if you are an 8 year old boy. I am not sure that Chinese soldiers wear farmers' hats. I strongly suspect that the costume is merely a background excuse to take a bamboo sword to school.
I suppose this makes a change from magic wands.
The pattern is Burda style 11-2009-143, boys' pyjamas, with the gathering cuffs left off, the top lengthened and turned into a wrap top. The trousers are cut down from a pair of mine -the fabric is a sort of polyester hessian that kept coming apart at the seams (I bound them for the costume). The top is a vaguely Asian print polyester woven, given to me by my grandmother about 20 years ago. You never know when these things will come in handy.
The hat is a gift from his aunt to his sister, from Vietnam, and the sword is a gift from his uncle, from China. Nicely international, and quite inauthentic.

Saturday, 13 November 2010

Recycled costume

SAM_2413

You have seen most of this sewing before. It is not even entirely my sewing, but I cannot resist posting about it again.
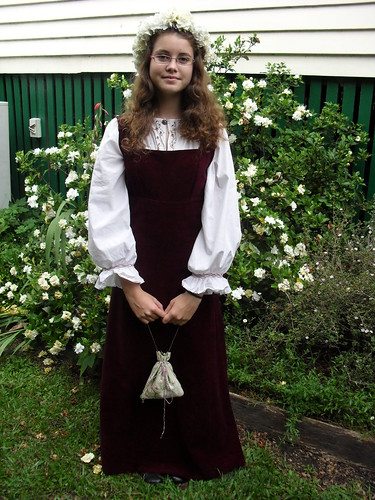
Pictured is my younger daughter in a "mediaeval" costume which she wore for a school excursion - history.
She is holding an embroidered sweet bag that she made herself as an assignment for this class.
SAM_2412
Her sister made the outer dress, for herself, to wear for an activity in the same class, 2 years ago, and I made the smocked and embroidered underdress/nightie.
We all made the garland that morning before school,from the gardenias you can see behind her (57 gardenias, sewn together, with a few bits of lavender and a ribbon).
She had a terrific day, and the costume incited considerable admiration from her peers, according to my daughter's account.
The best outcome from my point of view, is that she now wants to make a knee length summer dress for herself from the same pattern.

Saturday, 21 March 2009

The Archer - Making a quiver for a costume

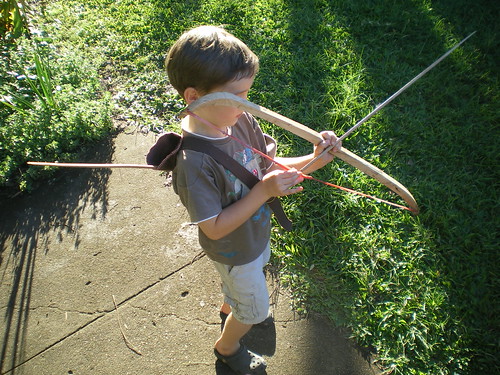
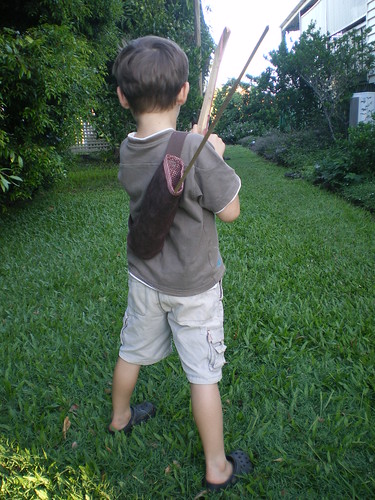
I have finally made my son a quiver for his new favourite activity - shooting limes from the tree with his self constructed bow and arrows (AKA dragon hunting). He was quite specific in his request - the quiver needed to belt across the chest diagonally, and he did not want a lid or flap to cover the "arrows" despite our discussion about the need to keep the bow string dry inside the quiver in a nod to historical veracity. This is a cartoon quiver!

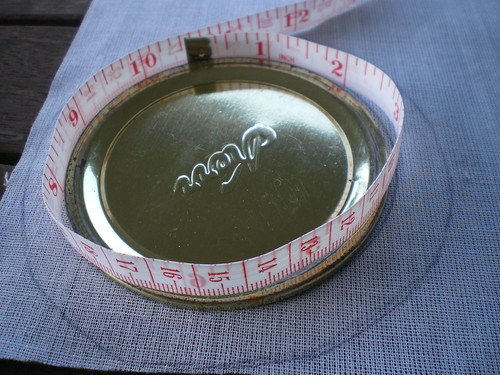
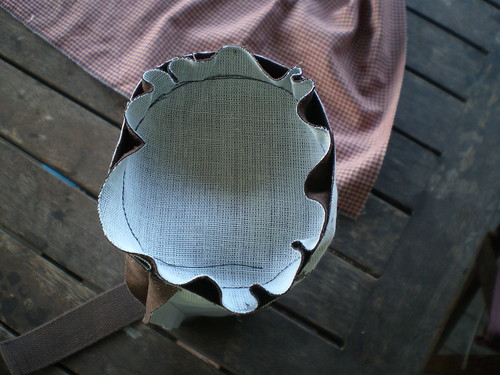
I took photos of the construction. The quiver was very simple to make. I used a canning jar lid as the pattern for the base, measured the seam line, and drew a rectangle with the same width as this measurement plus seam allowances for the body of the quiver.

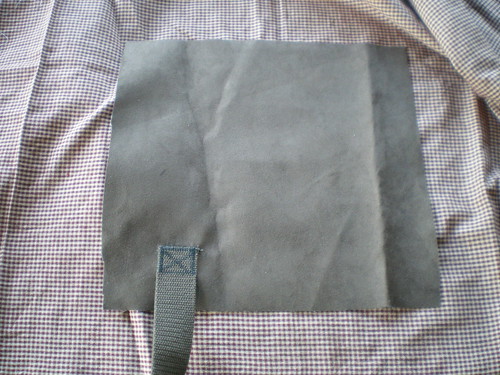
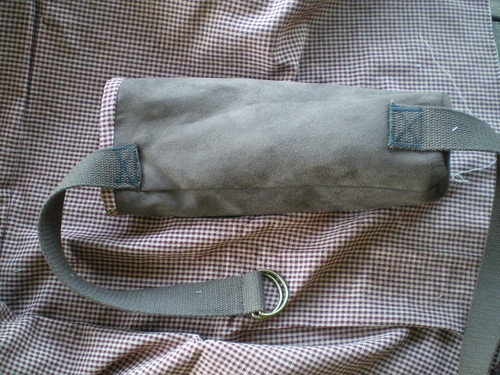
I used a webbing belt with D ring fastener that came with a pair of shorts as the strap. I sewed the bottom part of the belt (ring free end) to the base of the rectangle before sewing up the back seam.

The fabric for the outside is left over faux suede from upholstering dining chair seats. It does not ease at all well, but surprizingly sewed very easily into the cylinder I had made from the rectangle piece described earlier. I clipped the body of the quiver very slightly each 2cm around before stitching.

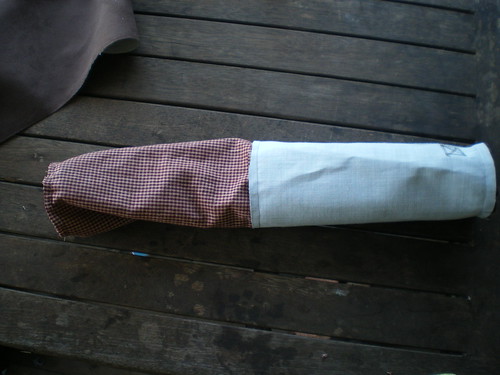
I lined the quiver with a woven plaid cotton. I left the lining open in the middle of the back body seam before stitching the lining and outside together at the top opening. This is where the bottom strap came in handy, it was very easy to pull the cylinders out to the right side by tugging on the strap.

Finally I stitched in the ditch at the top of the quiver, then sewed on the other half of the belt. The top section of the belt is offset from the bottom to encourage the quiver to stay put in a diagonal direction when worn across the back.


I tried to get a good shot of the quiver, but it was too busy working to stay in one spot for long.

Saturday, 12 July 2008

Tail and Mane Construction

Tails and manes are easy to make for costumes and dress ups, and can be quite effective.
I have added this tail type to the back centre seam of trousers, to velcro closing belts, but most frequently to all in one toddler pyjamas, Kwik Sew 1823. This particular type of tail is good for cows, leopards, lions and other cats, giraffes and donkeys.I usually use polar fleece remnants, but have also used cotton fleece, cotton lycra and other knit fabrics on occasion.
For the tail, cut a wedge shaped strip to the desired length. The narrow part should be at least 7.5cm (3 inches) wide, and the wide part around 12 cm wide (5 inches). I like the tail to the lower thigh for very small people who still crawl on occasion, but to mid calf or the ankles for older children so that they can see the tail if they whirl around.
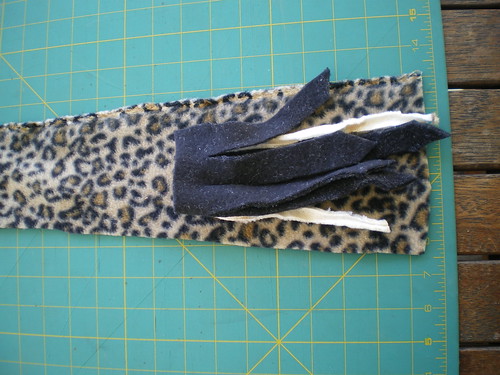
Cut 3 to 5 strips of knit fabric, around 10cm long (4 inches)and 5 to 7 cm wide (2-3 inches. I find the tails most appealing if several colours of fabric are used. Slash each strip lengthwise to within a few cm (around 1 inch) of the top. Lay these pieces on the wrong side of the tail wedge piece, at the fat end of the wedge, and stitch across, using a zig zag stitch, and a heavy stretch needle. I find that the tails are frequently pulled during wear, so stitch 4 or 5 times for reinforcement.

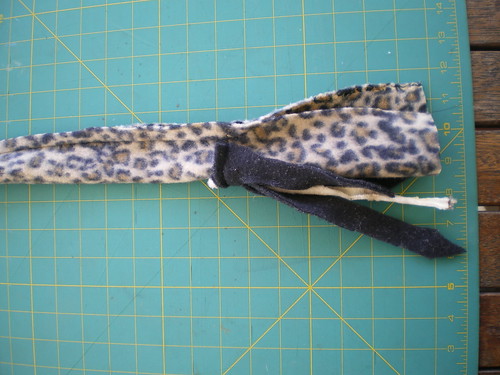
Fold the wedge over, right sides together, and stitch down the long side to 2.5 cm (1 inch) past the stitching line holding the slashed fabric strips. I use a wide seam allowance of at least 2 cm, so that the body of the tail has a little bulk without needing to be stuffed with additional material.


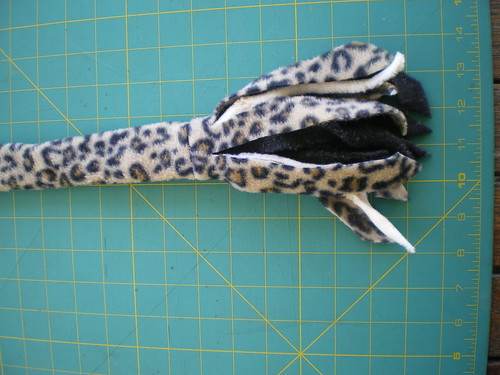
Pull the strips of fabric through the tube made by the upper part of the tail, attach upper end of tail to a belt, pants, or a slit cut in the centre back of the pyjamas at a tail appropriate level.


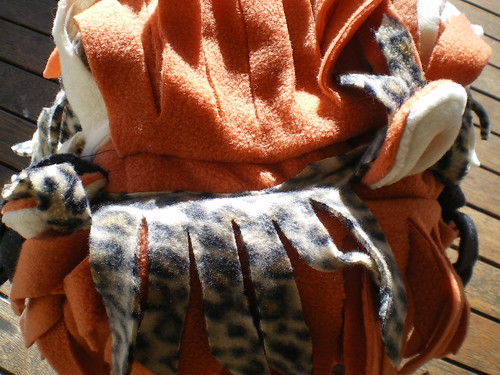
I have made several manes for various pyjama costumes. My favourite is the lion mane.

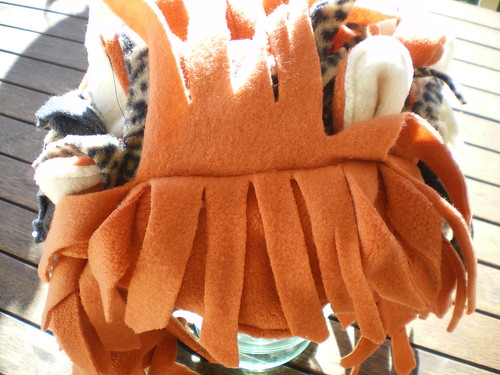
This is made by attaching slashed strips of polar fleece to a hood with ears. The first strip is 25cm wide , and slashed from both long edges to within 5 cm of the center. This strip was stitched down the center, right side to hood, then the strip close to the face opening was turned back over the seam.
Subsequent layers were single. Each remnant was trimmed into a rectangle, and slashed from one end. The opposite end was sewn,to the hood, right side down, so that when turned right side out, the slashed strips were lifted up slightly over the seam, giving the mane body.

Other manes include the giraffe mane, which was a long strip slashed from each side towards the center. These slashes were short and further apart. The strip was placed right side down on the hood and stitched down the centre. The mane was then folded wrong sides together, and stitched together 1cm away from the seam so that the mane would stick up a little in a giraffe like manner.

The horse mane was the first one I developed. This one is made from a strip about 50cm wide, slashed from each side to within 2 cm of the center, then simply stitched right side down to the hood. The mane is then swept to one side to give the effect of hair.
Here is my son's costume hood collection.

Friday, 11 July 2008

Giraffe Pyjamas

 
This suit was commissioned by my son. I have no idea where he got the idea for a giraffe suit, but it has been a bit of a technical challenge, in fact I made the pyjamas last year, but gave up on the hood after making giraffe horns as I had not much idea of how to proceed. This year I had more fortitude, after my husband bought some light fittings that just happened to come packaged with a bowl like styrofoam shape, and a 10 or so cm long styrofoam cylinder. The giraffe neck is built around the bowl sitting on top of the child's head, and the cylinder sitting on top of that. The remaining head and neck are firmly stuffed with polar fleece scraps.
 
The giraffe has a short mane down the neck. To make this stand up a little, I have stitched the two rows of mane together around 1cm from where it joins the head and neck on the outside.

I think this is my last hurrah with this pattern. I am planning to post construction details for the tail and for my neck changes, so I will be able to remember how to do it in a few years.
Posted by Picasa

Wednesday, 9 July 2008

More pyjamas with tails

 
I have been using Kwik Sew 1283 again to make fun pyjamas for my son, my nephew, my son's best friend and for 2 of my nieces. Everyone has a new leopard suit, and my son also has a lion suit with matching mane hood. The lion suit is my favourite at the moment. I am really pleased with how the hood turned out. I used Green Pepper Oregon jacket 150 hood as the starting point, then added ears. I sewed long strips of polar fleece across the hood, right side to hood, so that the cut strips were towards the face. When the strips are turned back on themselves so that the right side is to the outside, the mane has some body and stands up a bit. I used lots of skerrick remnants, and think the mix of fabrics looks very effective. I have also sewn a mane trim to the neck of the pyjamas, so that when worn to bed, there is still a lion effect. The suit also has a tail and claws for added fearsomeness.
 
The leopard suits are not quite so interesting. I have simply added a tail to each suit. My youngest niece has a pink version, just for a change.
 
Posted by Picasa

Wednesday, 18 June 2008

"Mediaeval" costume


My daughter made the overdress, head dress, surcoat and shoes for her costume, worn to a Mediaeval Day at school as part of this semester's history unit. The dress started as a size 6 tracing of McCalls 5177, no sleeves. The size 6 is the smallest size on the pattern sheet, and my daughter is actually a size4, but as the fabric used is a thick, possibly home dec fabric with some relation to plush cordory, and the dress is worn over a full length, volumious chemise, we thought a size 6 would fit better than the size 4, and did not bother scaling down (The fabric was donated to my mother's quilting group, and passed on to me as it is unsuitable for quilting, and none of the members fancied it). I made the SBA fitting adjustment suitable for a 13year old, and helped with final fitting tweaking, but all the sewing other than the zipper insertion (highly non authentic!)was done by my daughter without further assistance. I am very pleased, as now she can make all next summer's dresses for herself. This pattern has princess seams and a separate bodice and skirt, so I think it is a step up for her sewing.
The surcoat is rectangles of fabric, trimmed with faux fur. The sleeves were cut to shape whilst draped on my daughter. Again the sewing was all my daughter's work. The fabric is tracksuit fleece. This was purchased by mistake. A visitor was stopping at Spotlight on the way up from Brisbane, and asked if I needed anything. I asked for 5m of polar fleece in black or blue to make dressing gowns for my husband and son, and this is what she bought. I am glad to find a use for it! The fur is left over from a once off teddy bear making project which a friend talked me into. Teddy bear making is not my thing. In fact, I did not start the project!
The headpiece is made from scraps from the surcoat, some left over braid from cushion making, and a scrap of polyester chiffon that was purchased for children's Christmas craft projects. My daughter invented this after looking at 13th century engravings on the internet. The shoes are made from vinyl that was lurking at the bottom of the bag from my mother's quilting group, we found a costume making book in the library that showed us how to make shoes from different periods, and my daughter made these as well.
My daughter was kept very busy for several weekends working on this costume. Unfortunately it does not count towards her history grade, but she had a lot of fun, and has learnt some more about sewing.
Posted by Picasa