Showing posts with label Burda Style 12-2013. Show all posts

Monday, 24 November 2014

Project Formal. Culmination. Burda Style12-2013-122, 123 and 01-2014-113frankenpattern

Project Formal was a success. This dress is a frankenpatterned construction of black silk chiffon over ice blue silk twill, appliqued with lace motifs, and supported by an inner corselet. It was designed by my daughter with multiple revisions. I stretched my abilities with this frock, and am pleased with the outcome.


See my beautiful daughter graduating from high school. I am so proud of her.


I've written about some of the construction earlier:
dying lace
 underpinnings
day version
The basic construction of the frock was relatively straightforward after the trial versions. I made a silk twill layer with cotton batiste lining at the bodice, and a silk chiffon outer layer. These layers were constructed with the silk chiffon layer and outer silk twill layer as a single fabric, with the bodice neckline attached right sides together to the batiste lining for a neat upper edge finish.
I used the silk organza pattern piecing /underlining technique I learned from Susan Khaljie's Craftsy class to construct the bodice, making the marking of seamlines and other details very easy. The bodice has has additional rigilene boning in the side seams to aid stability.
 The skirts were basted together at the waistline with a selvage stay of silk organza, I hung the basted skirt up for several days weeks whilst I worked on the bodice, so the hem would not drop after I eventually hemmed it. When constructing the dress, I left in the selvage at the waist for added stability. The skirt is also attached together at the centre back at the zipper and centre back seam, with a tiny detatched section at the back hem.


I hand appliqued lace motifs to the bodice before attaching the skirt, through the top two layers of fabric, then continued hand applique of the lace motifs to the skirt attaching the lace to the outer silk chiffon layer only below the waist seam, to allow free movement of the outer skirt.
The hand applique was the most time consuming part of the project, taking approximately 30 hours. It looks pretty good even close up. My daughter really wanted a soft flowing skirt, hence the silk chiffon, in retrospect, hand applique on silk chiffon was not my cleverest idea, but I could not think of another method of attaining the soft flowing skirt with the lace applique she wanted. The inspiration dress had lace machine appliqued on organza and tulle, which would be much less time consuming!


Inside, all the seams are tacked to the silk organza underlining.
Unfortunately, I had a little trouble with the upper bodice, despite all the fitting work on earlier versions. After adding the lace applique, the added stiffness of the fabric make the neckline stand away from the body, which was not at all modest. After considerable trial and error, some of which may have been slightly fraught, this was fixed by first gathering the upper front bodice by hand, slightly, through the bottom two layers of fabric , then machine stitching lingerie elastic, on stretch, to the upper border of the bodice to draw the sweetheart neckline in towards the body.
This adjusted upper bodice was then stitched to the inner corselet at the centre front neckline.

Here you can see the elastic and gathering after I have removed the corselet in order to wash the dress and its underpinnings separately.

My other fitting adjustment was very last minute. In a not entirely unexpected manner, my finishing-her-exams- for- year- 12 daughter somehow managed to reduce her overall circumference by about an inch in the last two weeks of school.  Fortunately the corselet was originally fitted on the outer fastenings, so on the afternoon of her formal I sewed the back of the dress by hand to the back of the more tightly fastened foundation, gathering rather more than slightly. I may have spoken sternly to  my daughter about increasing her ice cream intake and decreasing her exercise regime whilst I did this.

The other effort of note was the hem.
My daughter is petite. This was just as well, as she wanted a full length 1/2 circle skirt from a narrow width of silk twill, 114cm (The Fabric Store, Auckland).
We could not quite manage this, until she came up with a brilliant idea of a nod to the current high/low hem fashion. She chose to have a higher curved hem in front, of the inner fabric only, to both accomodate the narrow fabric, and also to display her pretty sandals.
Here we are working on hemming. I used a machine rolled hem for both layers. I machine rolled myself 6 new scarves whilst I was practicing ;).

The frock was successful.She was happy.

I am hoping this dress gets another outing at a University Ball or even two.


Saturday, 27 September 2014

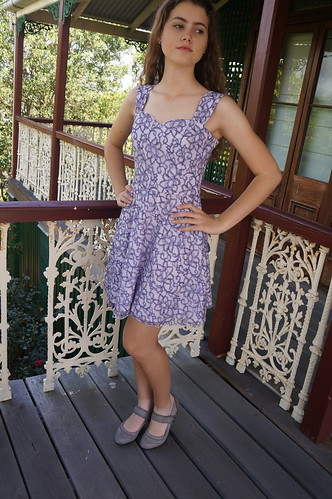
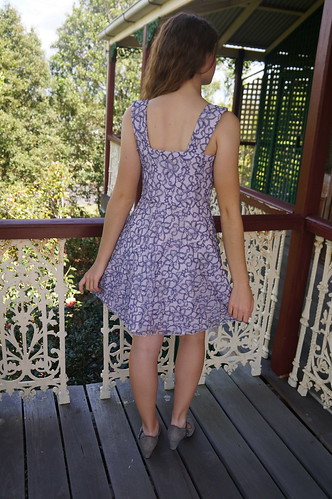
Project formal: The day version, frankenpattern Burda Style 12-2013-122 and 123 with a dash of Colette Parfait

When I made a formal dress for my older daughter, two years ago, she wanted a lattice smocked bodice, so I made a practice version of her formal dress in linen,as a day (or casual evening) version, so as to test the properties of this never-seen-anywhere lattice smocking application.

 This time, as I am not manipulating fabric and drafting my own bodice pattern, I saw no need for this step in the process. However, daughter the second, pointing out that the day version has been an extremely useful garment for her sister, described a sense of unfair garment distribution when I disclosed my intention to move straight into tracing pattern pieces on organza for the evening extravanganza version after fitting her dull calico toile. Being putty in her hands when she fancies a dress I fancy sewing, I have obediently made a more casual version of her frock, as a trial, using the pattern pieces I had selected for the evening gown, and practicing my techniques and finishes for sheers with a lace overlay.

DSC03826


technical drawing from burdastyle.com

The bodice is taken from Burda Style 12-2013-122, which conveniently comes in a size 34, so only needed petiting and taking in at the waist.
technical drawing from burdastyle.com
 
The skirt, which I really did want to try before wrestling with the chiffon, is from 123A of the same magazine issue and starts at size 72, which is the tall version of size 36 - too big, and my daughter is petite, so normally I would avoid a "tall" pattern like the plague. Fortunately, as this is a simple half circle skirt I was able to merely add a  big seam allowance at the waist line ( 2inches) and to draw a line parallel to the long-legged hem length at a more appropriate level to make this skirt approximate my daughter's measurements. The skirt was a bit difficult to handle due to using slightly unstable lace. I cut out the lace and thecotton batiste underlining in one layer (as I did for the bodice) then handbasted a strip of silk organza to the waist at both the cutting line and the seamline of the lace and the batiste separately, whilst the skirt was still lying on my cutting mats to minimize distortion. To fit the skirt to the bodice, I marked centre front  and back of both pieces, pinned, then draped the skirts around my daughter whilst she wore the bodice, and took in the single seam at the side (where I had chosen to place the invisible zip opening)

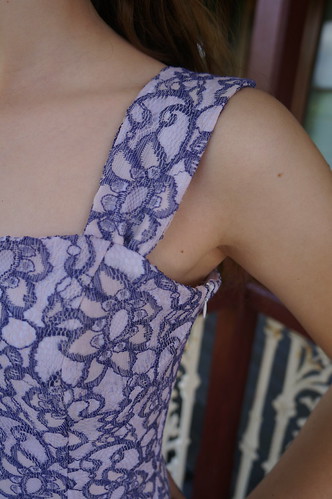
The bodice pieces were sewn with the lace and batiste together as one layer, and lined with another layer of batiste ( the pattern gives a bias layout for many of the lining pieces). I used silk organza to interface the upper edge of the finished outer bodice layer before applying the lining,and understitching the seam to prevent the lining showing to the right side.

DSC03828

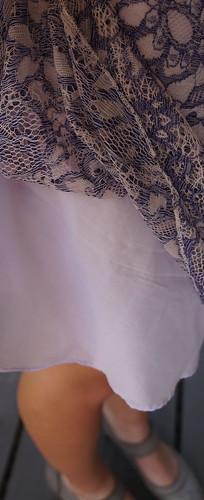
The two layers of the skirt were sewn as one at the waist, but separately in the skirt itself, below the zipper. I reinforced the lace seam with a strip of silk organza selvage.

DSC03827

The straps are from the Collette Parfait sundress. I like these wide straps for lingerie coverage, and also because the shaping at the shoulder keeps them actually on the shoulder. Instead of having the seams at the sides, I moved the seam to the underside of each of the front and back shoulder piece for a clean finish at the edges of the strap.

DSC03832
Having bias sections, the frock was hung for a few days before hemming - lace layer with a 3 thread rolled hem on the overlocker and batiste layer with a machine rolled hem.

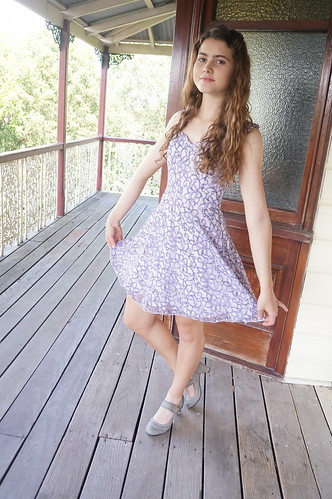
She is very pleased with this frock, and although she plans to leave it languishing in her wardrobe until after the formal so as to keep her fancy dress a Big Secret (although really, I don't think any one who doesn't sew would guess that both garments are from the same pattern), I am allowed to show it off for the blog. You are under strict instructions to ignore her sock tan line and to instead admire her beautiful shoes from Grandma. Isn't she lucky?

DSC03818

I am also lucky, because fortuitously, this frankenpattern frock has been made within the time frame when there is a frankenpattern challenge on at Pattern Review, so I shall enter this concoction (which was very easy to franken) just for fun. I am in favour of adapting patterns.

2014 FRANKENPATTERN (Sept 16th - Oct 15th)

Stashbusting statistics: about 2 metres lace yardage (Jan 2014 Remnant Warehouse, about 2 metres of cotton batiste, 2009)