Showing posts with label Project formal 2014. Show all posts

Monday, 24 November 2014

Project Formal. Culmination. Burda Style12-2013-122, 123 and 01-2014-113frankenpattern

Project Formal was a success. This dress is a frankenpatterned construction of black silk chiffon over ice blue silk twill, appliqued with lace motifs, and supported by an inner corselet. It was designed by my daughter with multiple revisions. I stretched my abilities with this frock, and am pleased with the outcome.


See my beautiful daughter graduating from high school. I am so proud of her.


I've written about some of the construction earlier:
dying lace
 underpinnings
day version
The basic construction of the frock was relatively straightforward after the trial versions. I made a silk twill layer with cotton batiste lining at the bodice, and a silk chiffon outer layer. These layers were constructed with the silk chiffon layer and outer silk twill layer as a single fabric, with the bodice neckline attached right sides together to the batiste lining for a neat upper edge finish.
I used the silk organza pattern piecing /underlining technique I learned from Susan Khaljie's Craftsy class to construct the bodice, making the marking of seamlines and other details very easy. The bodice has has additional rigilene boning in the side seams to aid stability.
 The skirts were basted together at the waistline with a selvage stay of silk organza, I hung the basted skirt up for several days weeks whilst I worked on the bodice, so the hem would not drop after I eventually hemmed it. When constructing the dress, I left in the selvage at the waist for added stability. The skirt is also attached together at the centre back at the zipper and centre back seam, with a tiny detatched section at the back hem.


I hand appliqued lace motifs to the bodice before attaching the skirt, through the top two layers of fabric, then continued hand applique of the lace motifs to the skirt attaching the lace to the outer silk chiffon layer only below the waist seam, to allow free movement of the outer skirt.
The hand applique was the most time consuming part of the project, taking approximately 30 hours. It looks pretty good even close up. My daughter really wanted a soft flowing skirt, hence the silk chiffon, in retrospect, hand applique on silk chiffon was not my cleverest idea, but I could not think of another method of attaining the soft flowing skirt with the lace applique she wanted. The inspiration dress had lace machine appliqued on organza and tulle, which would be much less time consuming!


Inside, all the seams are tacked to the silk organza underlining.
Unfortunately, I had a little trouble with the upper bodice, despite all the fitting work on earlier versions. After adding the lace applique, the added stiffness of the fabric make the neckline stand away from the body, which was not at all modest. After considerable trial and error, some of which may have been slightly fraught, this was fixed by first gathering the upper front bodice by hand, slightly, through the bottom two layers of fabric , then machine stitching lingerie elastic, on stretch, to the upper border of the bodice to draw the sweetheart neckline in towards the body.
This adjusted upper bodice was then stitched to the inner corselet at the centre front neckline.

Here you can see the elastic and gathering after I have removed the corselet in order to wash the dress and its underpinnings separately.

My other fitting adjustment was very last minute. In a not entirely unexpected manner, my finishing-her-exams- for- year- 12 daughter somehow managed to reduce her overall circumference by about an inch in the last two weeks of school.  Fortunately the corselet was originally fitted on the outer fastenings, so on the afternoon of her formal I sewed the back of the dress by hand to the back of the more tightly fastened foundation, gathering rather more than slightly. I may have spoken sternly to  my daughter about increasing her ice cream intake and decreasing her exercise regime whilst I did this.

The other effort of note was the hem.
My daughter is petite. This was just as well, as she wanted a full length 1/2 circle skirt from a narrow width of silk twill, 114cm (The Fabric Store, Auckland).
We could not quite manage this, until she came up with a brilliant idea of a nod to the current high/low hem fashion. She chose to have a higher curved hem in front, of the inner fabric only, to both accomodate the narrow fabric, and also to display her pretty sandals.
Here we are working on hemming. I used a machine rolled hem for both layers. I machine rolled myself 6 new scarves whilst I was practicing ;).

The frock was successful.She was happy.

I am hoping this dress gets another outing at a University Ball or even two.


Saturday, 27 September 2014

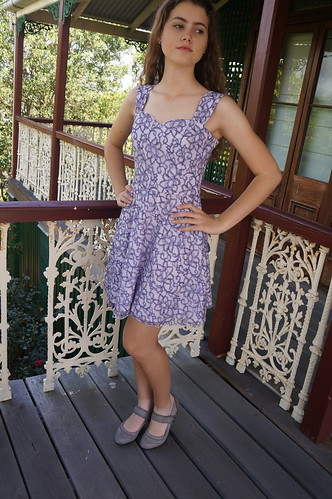
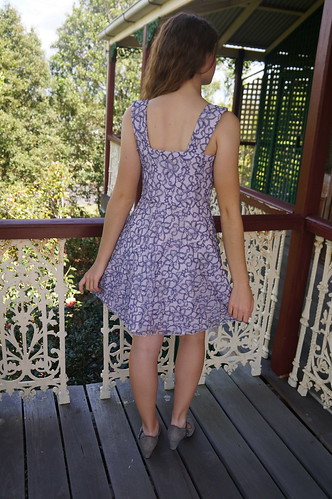
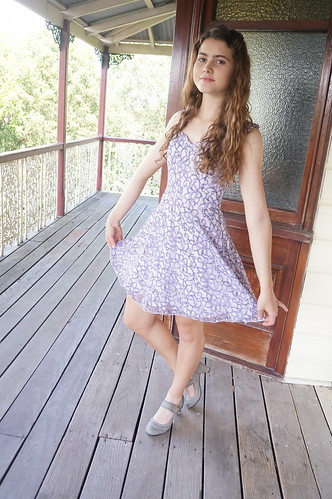
Project formal: The day version, frankenpattern Burda Style 12-2013-122 and 123 with a dash of Colette Parfait

When I made a formal dress for my older daughter, two years ago, she wanted a lattice smocked bodice, so I made a practice version of her formal dress in linen,as a day (or casual evening) version, so as to test the properties of this never-seen-anywhere lattice smocking application.

 This time, as I am not manipulating fabric and drafting my own bodice pattern, I saw no need for this step in the process. However, daughter the second, pointing out that the day version has been an extremely useful garment for her sister, described a sense of unfair garment distribution when I disclosed my intention to move straight into tracing pattern pieces on organza for the evening extravanganza version after fitting her dull calico toile. Being putty in her hands when she fancies a dress I fancy sewing, I have obediently made a more casual version of her frock, as a trial, using the pattern pieces I had selected for the evening gown, and practicing my techniques and finishes for sheers with a lace overlay.

DSC03826


technical drawing from burdastyle.com

The bodice is taken from Burda Style 12-2013-122, which conveniently comes in a size 34, so only needed petiting and taking in at the waist.
technical drawing from burdastyle.com
 
The skirt, which I really did want to try before wrestling with the chiffon, is from 123A of the same magazine issue and starts at size 72, which is the tall version of size 36 - too big, and my daughter is petite, so normally I would avoid a "tall" pattern like the plague. Fortunately, as this is a simple half circle skirt I was able to merely add a  big seam allowance at the waist line ( 2inches) and to draw a line parallel to the long-legged hem length at a more appropriate level to make this skirt approximate my daughter's measurements. The skirt was a bit difficult to handle due to using slightly unstable lace. I cut out the lace and thecotton batiste underlining in one layer (as I did for the bodice) then handbasted a strip of silk organza to the waist at both the cutting line and the seamline of the lace and the batiste separately, whilst the skirt was still lying on my cutting mats to minimize distortion. To fit the skirt to the bodice, I marked centre front  and back of both pieces, pinned, then draped the skirts around my daughter whilst she wore the bodice, and took in the single seam at the side (where I had chosen to place the invisible zip opening)

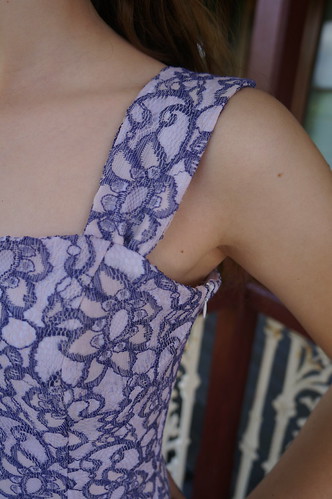
The bodice pieces were sewn with the lace and batiste together as one layer, and lined with another layer of batiste ( the pattern gives a bias layout for many of the lining pieces). I used silk organza to interface the upper edge of the finished outer bodice layer before applying the lining,and understitching the seam to prevent the lining showing to the right side.

DSC03828

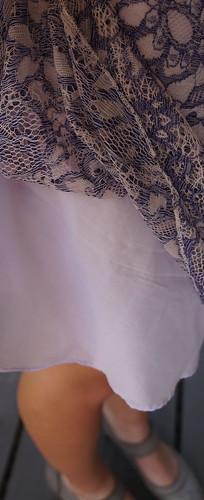
The two layers of the skirt were sewn as one at the waist, but separately in the skirt itself, below the zipper. I reinforced the lace seam with a strip of silk organza selvage.

DSC03827

The straps are from the Collette Parfait sundress. I like these wide straps for lingerie coverage, and also because the shaping at the shoulder keeps them actually on the shoulder. Instead of having the seams at the sides, I moved the seam to the underside of each of the front and back shoulder piece for a clean finish at the edges of the strap.

DSC03832
Having bias sections, the frock was hung for a few days before hemming - lace layer with a 3 thread rolled hem on the overlocker and batiste layer with a machine rolled hem.

She is very pleased with this frock, and although she plans to leave it languishing in her wardrobe until after the formal so as to keep her fancy dress a Big Secret (although really, I don't think any one who doesn't sew would guess that both garments are from the same pattern), I am allowed to show it off for the blog. You are under strict instructions to ignore her sock tan line and to instead admire her beautiful shoes from Grandma. Isn't she lucky?

DSC03818

I am also lucky, because fortuitously, this frankenpattern frock has been made within the time frame when there is a frankenpattern challenge on at Pattern Review, so I shall enter this concoction (which was very easy to franken) just for fun. I am in favour of adapting patterns.

2014 FRANKENPATTERN (Sept 16th - Oct 15th)

Stashbusting statistics: about 2 metres lace yardage (Jan 2014 Remnant Warehouse, about 2 metres of cotton batiste, 2009)

Friday, 5 September 2014

Project formal, the foundation. Burda Style 01-2014 113 + Patternmaking for Underwear Design

I've made a couple of formal dresses before, but somehow, this is turning into one of my most technically challenging projects. Most of this is self inflicted! Some of my blogging absence has been due to a lot of unblogworthy thinking and planning time. (The rest was knitting.....)

DSC03712

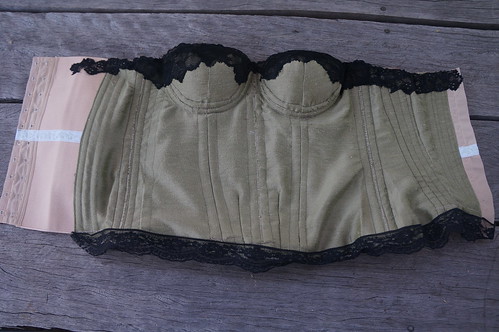
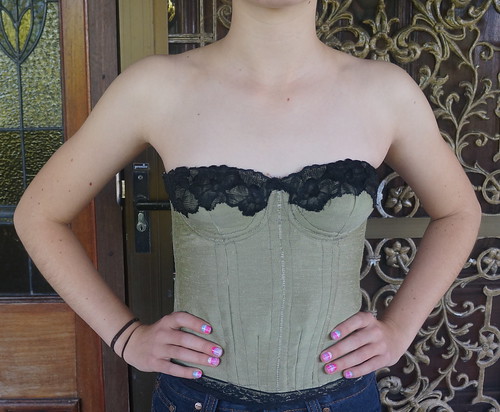
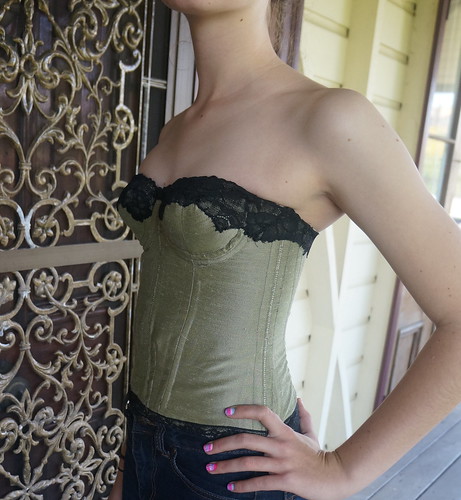
 Most strapless dresses need a foundation to prevent wearing malfunctions. For my older daughter's formal dress, also strapless, I made a traditional princess line bodice foundation, based on Claire Shaeffer's somewhat scanty instructions in Couture Sewing Techniques, and was happy with it. However, daughter the second has a more curvaceous figure, and more exacting requirements, and wanted more shape and structure in the bust of her foundation to emphasise the sweetheart neckline of her dress. She wanted something more like a long line bra or corselet.
Unfortunately, the bust section of the Burda bustier toile I made earlier was not at all flattering, nor supportive. I decided to add bra like cups and bridge to the bustier,  for more structure,and went looking for either my Kwik Sew bra pattern, or my Leanne Burgess bra making book. 2 days later, my pattern collection and fabric cupboard were unaturally tidy, and I was forced to realise that I had carefully put all my lingerie sewing references in a Safe Place, from where they would only emerge again when they were not immediately required.
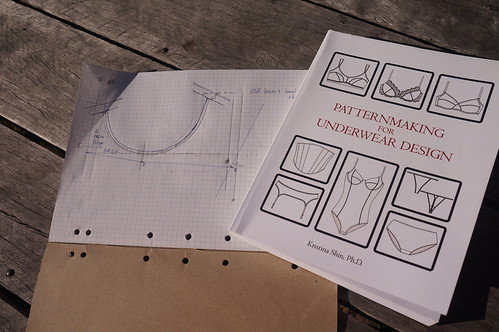
My long suffering family (one of whom suggested that I buy a corset!) was greatly relieved that I was rescued by Kristina Shin's Patternmaking for Underwear Design, a book that has been lurking on my sewing shelf since Christmas, after my inital perusal filled me with disappointment. I had bought it with the intention of drafting myself a bra pattern, but the only bra drafting instructions in the book are for a 75B, which fits no one in our house, and the measurements for each drafted line are given  within the instructions, with no tables for any other sizes, making the usefullness of the bra instructions quite limited - but we decided to increase the cup size of the foundation for illusionary purposes, and decided the given cup size of 75B would do for the size 34-taken in bustier, with a bit of discreet curve enhancement.

DSC03674

I drafted a 3 part T cup underwire bra cup and bridge, following the instructions without undue difficulty (although having 2 unlabeled markings that were only identifiable by reading two separate earlier chapters of the book was annoying, as was the tendency to constantly refer back to the basic bra block- which uses the same letters as point markers as the 3 part cup, only in completely different places!).
DSC03675 

This was not quite the shape we wanted, so I then rotated and split the lower cup and drafted an upper cup to fit a slightly higher bridge and not require a strap - a shape that is not given in Shin's book.
The cup was larger than expected, despite being cut out in a woven rather than a knit, as assumed in the instructions. This could have been operator error and was fixed with a bit of trial and error trimming. Fortunately I do not plan to make a lot of these garments in the illusionary size.
I used foam bra lining (cut out and pieced to fit from an existing bra, and added a small "fillet" made from 2 layers of cotton/wool quilting batting to the lower third of each cup. The "pad" or "cookie" shape given in Shin's book was not the correct size nor shape for the cups, so this was again made by  trial and error.
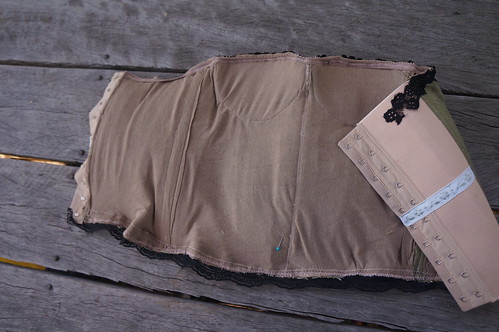
As the upper cup was still too large, and we did not want excessive padding, I applied 3 rows of shirring elastic by this method through the outer cup fabric and foam lining at the top of each cup and gathered these to fit. Although producing the desired effect, this looked rather messy, so I lined the corset with a rayon knit (I draped this over the finished outer corselet and cut to fit - much easier than applying all the fitting changes from the woven outer pieces to a woven lining)

DSC03713

The entire upper border of the corselet is finished with  slightly stretched lingerie elastic for added security. I hand appliqued a stretch lace to the upper cups to cover the shirring (this is practice for the actual dress), and also to most of the upper border of the remaining corselet because it looked pretty.

DSC03704

The remainder of the construction was much more straightforward. Each vertical seam is boned with rigeline on both sides of the seam. The outer fabric is a firm weave silk (from my grandmother's silk painting supplies), and the underlining is silk organza. The boning casing is herringbone weave linen.
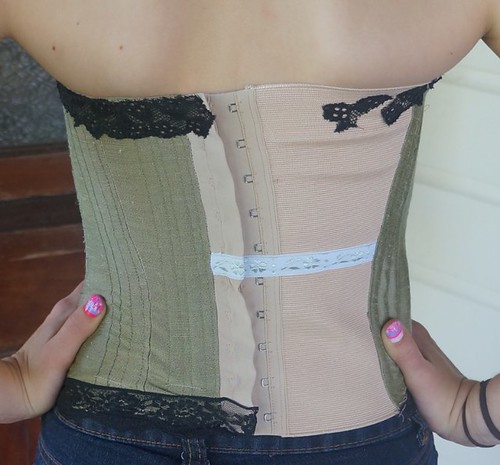
As it is still 9 weeks to the wearing of the dress, I wanted to allow some room for girth changes.  so I used a commercial elastic fastening (Prym) instead of the right centre back section . As you can see, I actually used two of these, as the fastening is designed for a long line bra. The two fastenings are abutted, joined with zigzag stitch, and a ribbon applied over the seam for prettiness (she doesn't need the stretch at the waist). I chose to fit at the wider of the two hook and eye loops as my daughter tends to lose weight when under stress, and is currently finishing her final year at school, with constant assignments and exams. If the opposite occurs, well there is a bit of stretch in the elastic ;).
DSC03709

The lower border of the corset is zigzagged to attach all the layers, then non stretch lace was applied to cover the zigzagging. I did not want to add bulk with a hem or binding.

DSC03706

The finished foundation met with approval, and I am well into the next stage of the dress.

Friday, 4 July 2014

Project Formal: Dyeing the lace

All this prosaic sewing has been very useful for halo shining, but today I had the day off, and have devoted the sewing portion of it to delightful frivolity. (There has been a small amount of hinting, increasing in frequency, that there are Only 130 something days until I have to come up with the  formal dress)

DSC03523

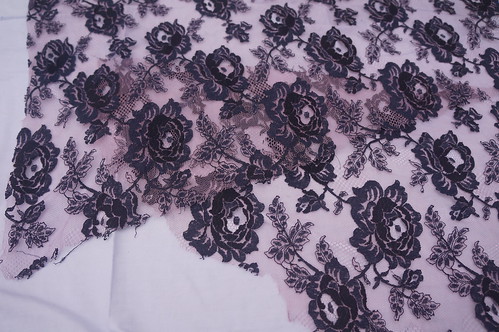
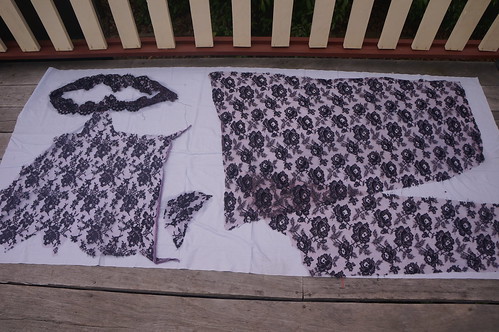
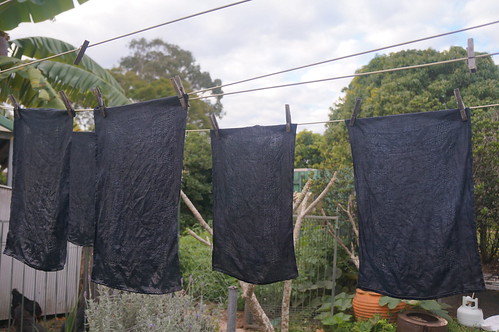
I've dyed the lace.
 DSC03521
I'm not sure that the outcome is successful, as the recipient is not home yet, and may reject this black and pale purple combination as not being true to her vision, but I think its quite interesting in its new shades
DSC03522
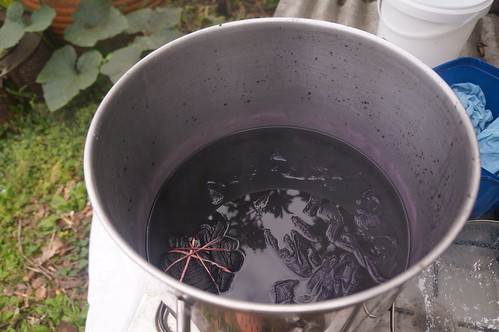
When I burn tested the laces (there are 3 differently sourced laces), I had a quick ignition, bright flame, a woody smell and an ashy remnant, no beading, which I thought indicated a natural fibre, such as rayon or cotton. As this is elderly lace and was quite costly at the time, this seemed a likely fibre for its composition, so I dyed it using a fibre reactive dye, by the tub dyeing method, using these techniques from Dharma fabrics specific to black.
Note: Soda Ash is called Washing Soda in Australia (sodium carbonate) and I bought mine very inexpensively from the supermarket.
I had several dyes, and chose #300, as it is described as having a blue cast, and the under fabric for the dress is a silvery blue. I now strongly suspect that the netting of the lace is a polyester, and in my opinion, the cast is purple, rather an attractive purple, but definitely not blue.
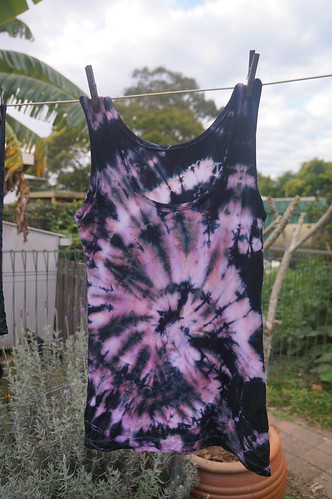
At the same time, my older daughter threw in a cotton/lycra singlet to tie die.

DSC03524
Quite interesting again, and much more purple than blue.
In the left over dye bath, I soaked some some allegedly Irish Linen placemats that my mother retrieved from a church garage sale in case I might need them.

DSC03525 

They were a pastel blue that I find hideous, and I much prefer their new colour. They may end up in a garment, or we may have new placemats.
All this dyeing took 3+ hours of activity, and 30 minutes soaking time in dye fixative solution. I enjoyed it, but I don't think I'll be doing it regularly.

Friday, 23 May 2014

Someone else's dream dress. Project formal is underway

In our town, graduating from high school is very big deal. The graduation dinner requires a formal outfit, a large proportion of town turns out to watch the grand entrances, and the local paper sells out in about 5 minutes after publishing all the photos of the school leavers all-dressed-up. I had great enjoyment making a fabulous evening gown for daughter the first, and now have the opportunity for another exciting sewing adventure.
Daughter the second has been thinking about her dress for quite some time. Just recently, her hinting reached a level suggesting some anxiety - not what a young woman completing year 12 needs, so I thought I'd better get my act together, despite having 6 months in hand to complete this creation.
I have quite clear instructions.
This is the inspiration dress, with the greatest appeal being the lace applique placement and the transluscent overlayer

 
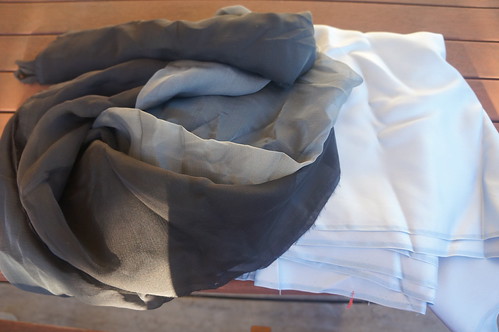
I think it is a Mariana Hardwick dress, but my daughter is not sure of the source of the photo. However, the formal dress will have a coloured underlayer (icy blue/grey silk twill) and an ombre black to grey silk chiffon overlayer.

The gown is to have a strapless sweetheart neckline and the skirt is to be less full, and floor length. I am thinking a circle skirt, as I have been asked to minimise seams (fortunately this is not too tricky in floor length for a petite person), but will have to try this out in a mock up prior to approval.

Here is the fabric we bought at Global Fabrics in Auckland last December (she is a girl who likes to plan ahead). The silk twill is more blue than it appears on my computer screen.

DSC03237
 
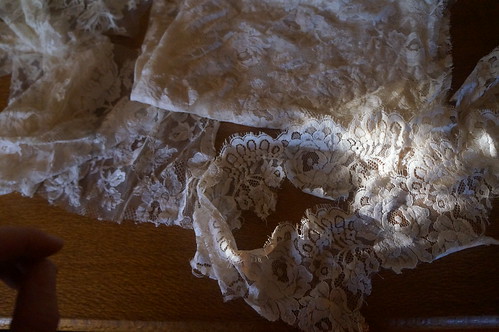
Here is the lace I am to dye for the dress. It is several  generous ancient remnants from my  wedding dress, which I find rather pleasing for sentimental reasons - that is, if it doesn't disintegrate with age when I try dyeing it!

DSC03238

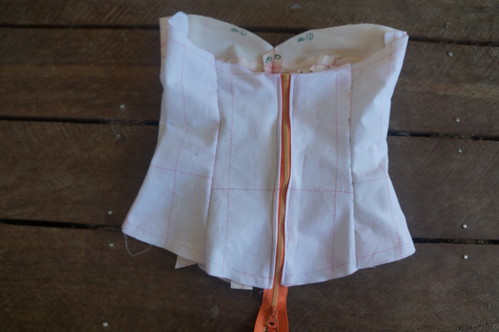
I've started with a toile of the inner corselet.

I wanted to make a different understructure from that in my older daughter's dress, and after looking at quite a few dress inners kindly displayed on sewing blogs have decided to make an understructure with built in bust cups and underwires, rather than the more simple princess line corselet suggested by Claire Shaeffer's couture sewing book that I used last time. I feel that the more structured corselet will be more suited to the figure of daughter the second in addition to providing me with a different technical challenge

Poppykettle's posts about Marfy and Burda Style corselets


technical drawing of poppykettle's 03-2010 corset bodice pattern from http://www.burdafashion.com
Frabjous Couture post about Balmain Strapless dress insides

Frabjous Couture post about Christian Dior strapless dress inside

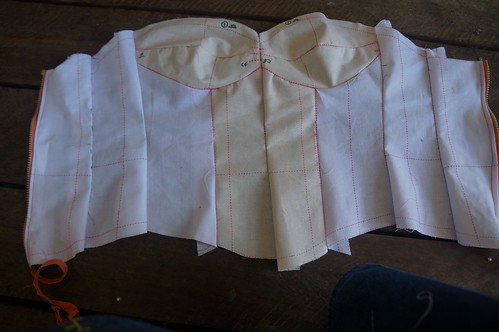
I've started with the bustier from the January Burda 01-2014-113, which fortunately starts at a size 34, so I don't have to scale it down.

technical drawing from http://www.burdafashion.com
I have moved the opening to the centre back,  and found that it was easy to adjust the fitting - about 1cm off each side of the 3 centre front seams  and a smidgeon added to the two back/side back side seams below the waist. It is now fits very nicely through the waist, upper hips and back, in calico.
 
DSC03347

DSC03348

Unfortunately, although the upper line of the bodice is very pleasing, and not too low, I do not care for the shaping at the bust, which is mysteriously flattening and also pointy. I plan to swap out the lower bust piece for a 2 part bra pattern, and possibly dart the upper piece -then I will have to decide about the boning placement. Most of the pictures I have seen include boning over the bust, but I am not sure that I will be able to make this undetectable from the outside of the dress. I wonder if the underwires might provide enough structure. Any tips? I will be grateful for advice. I'll use polyester boning, not having easy access to spiral steel boning. Fortunately the recipient of the gown, although curvy, is also slender and very fit, so doesn't really need a lot of structure other that what is designed to keep the gown from slipping off!

Having been fitted into toile, my daughter's frock anxiety seems to have diminished considerably. Hopefully I can get a few more work clothes done before she needs me to work on it again!