Showing posts with label BWOF 7-2008. Show all posts

Sunday, 19 February 2012

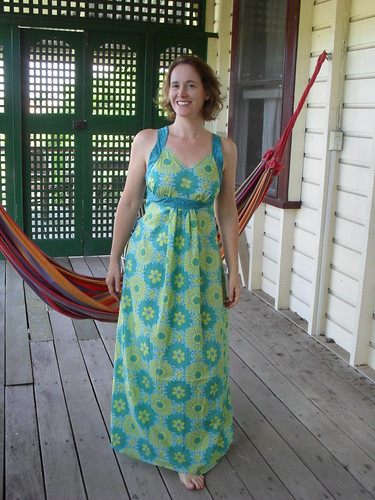
Hot weather dress BWOF 07-2008-119

February is the hottest weather here, and it is also very muggy and humid.
This weekend I actually made something suitable to wear in my climate. It is, however, not suitable in any other way, being a garment obviously designed for a tall, young woman, with a slender bosom. It is also designed to be worn over a swimming costume, whilst displaying most of the swimming costume and its contents.
I made a few changes, being neither young, slender of bosom nor intending to wear this over a swimming costume. It is possible that I did not make quite enough changes and continuing readers do so at their own risk.

SAM_0770
SAM_0764
There, that wasn't as bad as you were thinking, was it?
This "improvement" has 2 main sources.
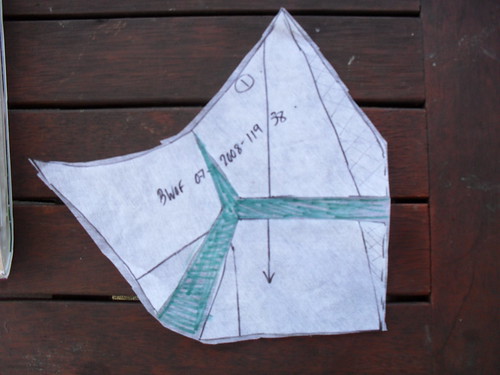
1. I raised the neckline (can something that low be a neckline?) and made a FBA.
I strongly suspect that the original bodice was drafted for a scanty A.
SAM_0771

2. I sewed the cups, bridge and some of the sides of a bra that had strap ageing issues to the wrong side of the bodice lining. I would have taken a photo of this construction addition for posting purposes, but I did it last night and it was too dark.

Other fitting changes included, unfortunately, taking up the straps at the shoulder by 1 inch post construction, something I should have predicted, and using every skerrick of my seam allowance at the centre back waist - highly unusual for me, as I usually need to take in the waist for Burda.

You can see from the horrible wrinkly look at the straps and empire band that I failed to interface sufficiently, or indeed, at all. I do not think this is really a problem compared to the other issues keeping this dress inside the house, as having no interfacing makes the dress even less warm to wear. The fabrics are cotton voile and cotton shirting.

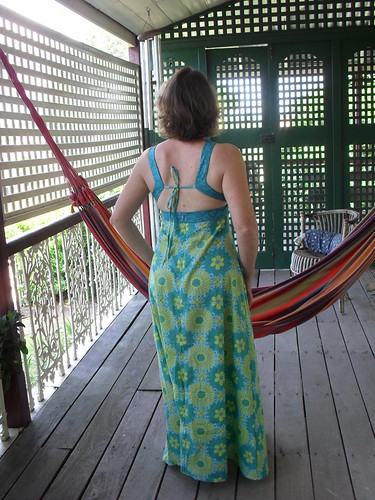
The back of this sundress is rather daring (for me).
SAM_0761
I could not do up the tie by myself, which also makes it rather impractical.

However, I think it will serve its purpose admirably.

SAM_0766
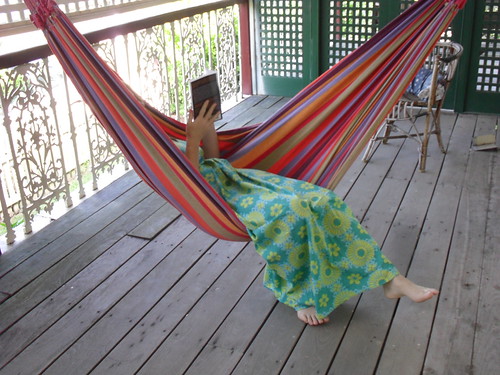
Perfect for lying in the hammock, now where is that long cool drink?

Friday, 17 October 2008

BWOF 07-2008-136 baby romper and hat

I have started making Christmas presents, as I hope to make pretty clothes as gifts for each of my 7 nieces. Today I was lucky enough to look after my next-to-youngest niece for the day, and took the opportunity to do a little fitting and also take some photographs of her in some of her presents. I guess this means her present is really a gift for my SIL! I will have to buy my niece a book as well.
I did not have as much luck with the photos as I would like, due to lack of toddler co-operation. Here is a flat photograph of my version of hat and romper number 136 from the July 2008 Burda world of fashion. I made the size 80cm, equivalent to size 18 months, as my niece will be 18 months old in December. The hat is size 48cm, the largest size in the pattern.
 

I left off the sleeves, as it is very hot here in December. I bound the armhole with constrast bias binding, and piped the round yoke.
 

I particularly like the pocket details. I made the ties thinner than the pattern called for - around 5mm wide finished, as I felt the original width covered up the v cut-out.
 

The size is a little smaller than Australian RTW 18months. My niece is not particularly big for her age, and the clothes fit her quite well now, at age 16 months. The fit of the hat is quite close, and if I were making it again I would make the circumference a little larger. I have used hat elastic to keep the hat on, rather than ties.
 

I think this is a very pretty toddler outfit, and hope my sister-in-law likes it.
Posted by Picasa

Thursday, 9 October 2008

BWOF 07-2008-116

My daughter needs a few summer tops, so I have started on 116 from the July BWOF. I scaled down to a 32 at the bust, and raised the front neckline 2 inches.


I made the ties a little more skinny than the pattern called for, so that there was plenty of room in the casing.
 

The fabric is a quilting cotton. I have piped the neckline in one of the colours from the fabric.
 
. I will review the pattern at pattern review this evening. I made a few construction changes, but it was a pretty easy pattern.
Posted by Picasa

Monday, 4 August 2008

BWOF 7-2008 #135 Burda version vs my version

 
I have finished my version of the #135 dress. At first glance it appears very similar to Burda's dress, but that was the idea.
 
I know this sounds arrogant, but the main improvement in my version of the dress is the ease of the pleating, smocking and construction, and I cannot really show you this. With the Burda version, I had to wrestle with many aspects, one of the worst was applying the bias binding to the neckline. You can see that in my version, the on grain neck, and the line of cable within the seam allowance make the application very straight forward. I lined up the edge of the bias strip with the line of cable smocking, stitched around 3mm away, and not only did my wave stitches stay an equal distance away from the neck, but all my pleats remain straight, and evenly spaced. This was not what happened in the Burda dress, despite serious sewing wrestling.
 
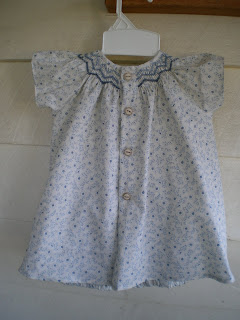
You can see the difference that this makes to the finished dress in this close up. Part of the better appearance of the strawberry print is the additional width of fabric in the bodice.
 
The other aspect of my version that I like is the less voluminous skirt. The Burda skirt is as wide as the baby is long. The Burda sleeves are also more voluminous.
I do think that you can make a pretty smocked dress as a smocking newbie, just using written instructions. I am pleased that Burda put one in their magazine to entice new smockers, I just wish they had made the pattern more user friendly.
Posted by Picasa

Sunday, 3 August 2008

Pleating, Blocking, Smocking altered version of BWOF 7-2008 #135

After altering the a line dress to a bishop dress as described in my post yesterday, I am now reaping the rewards of this change. First, this new version is much easier to pleat, as the neckline is on the cross grain. Instead of using the curved template that Burda instructs you to transfer to the neckline, which I can assure you is time consuming,tedious,and difficult to keep accurate, the new version can be pleated by much quicker methods. I used a pleater.
 

An alternative is to use a smocking dot transfer
 
However, if you are new to smocking, and using this as a first attempt, you do not need any fancy equipment. You can rule 6 lines horizontally, 1cm apart (note I suggest 6 lines, not 4 as Burda instructs) with the first line just above the stitching line of the neck, around 3mm. Mark each of these lines at 1cm intervals. These marks are where you stitch to gather the fabric - Burda's instructions are correct in this section.
Once you have pulled up the threads to gather your fabric, you need to block the neckline to the shape of Burda's pattern piece. Burda's instructions give a rough idea of how this is done. The template should have the top edge on the second row of gathering (this would be the first row if you use only 4 rows as per Burda) and the bottom edge on the 5th row of gathering (4th per Burda). If you lightly spray the fabric with starch, evenly spread the pleats in a fan shape. In the new version, the fan spreads out more gradually, as there is a lot more fabric. Pin the neckline to a flat surface, I use my ironing board. You can then either lightly steam the pleats, holding the iron above the fabric, or allow the starch to air dry. When the fabric is dry, you are ready to smock. However, although Burda tells you to mark the centre front of the dress, it does not tell you that your smocking design should be centred here too. After you have pleated the garment, your centre front is the valley between the 2 centre pleats. You do need to count your pleats to find out where this valley is located. If it is more than a few mm off the marked centre front of the fabric, you will need to unpick some pleats from the more numerous side in order to have the centre of your smocking design at the centre of your fabric. Start your smocking with an over cable at the 2nd line of gathering thread, work to one end, then turn and start from the middle again. This will make your design finish at the same part of the pattern at the back. I have chosen to finish at a cable, as I find this neat and visually satisfying.
 

I have used the same smocking design - the 4 step wave, as my take on the Burda intent and used in the previous version of this dress. The dress size is the same, and I have again used 3 strands of DMC thread. As there are more pleats, and the pleats are now close to each other, the effect of the same stitches is much more rich and textural. It was also far easier to stitch, and I had no difficulties in keeping the pleats in the blocked shape.
You can see that the first row of gathering has a cable stitch along the gathering thread. This is a holding row, to keep the pleats even during smocking, and in garment construction. You will not see this line in the finished garment. The gathering thread below the smocking is used to help keep the lower edge of the pleats evenly fanned out during the smocking.
I hope to construct the new version of the dress tomorrow. I have made one change to my pattern already - I think the sleeves are too long and too curved, and have trimmed them down around an inch at the deepest part of the curve, tapering to nothing at the side seam.
 
Posted by Picasa

Saturday, 2 August 2008

Reinventing the wheel - turning Burda A line dress into a bishop

I have worked out that I have a lot to say about this new smocking plan, so have decided to write about it in several stages. This is how I am redrawing the Burda WOF July 08 #135 dress into a pattern that is easy to smock. My plan is to have a dress that looks like the one I have already made, from the magazine pattern, but is easy to mark, pleat, smock and construct, and does not have the nasty neckline I showed in my previous post. It would be much easier for a novice smocker to go straight to a good pattern, such as one from Australian Smocking and Embroidery magazine, Children's Corner, Cherry Williams or even an old Vogue or Simplicity pattern, but I would like someone who just has this Burda magazine to be able to fix the problems I see with the pattern. (If you are interested in a different bishop pattern, look at pattern review, the Australian Smocking and Embroidery Magazine patterns are in the "other" pattern company, usually under "baby clothes", and the other patterns are reviewed under the pattern company names, again usually under "baby clothes" or "toddler clothes")
 
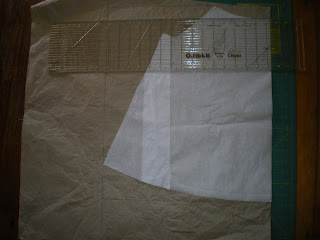
First I used the front dress piece, which is cut on the fold. I marked the widest part of the hem, the lowest part of the hem, and both the lowest and highest point of the neck. I then ruled straight lines from each of these points to make a rectangle. I used both the high and low points of the neck, as I will later ensure that the smocking includes both of these points.
 

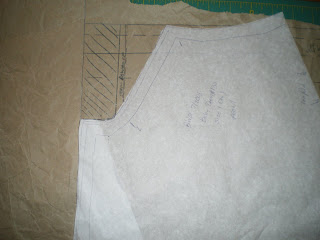
Next I pivoted the Burda front piece so that their side seam was on my new side seam (actually on the seam allowance, but this will not make a difference, as the seam allowance is the same on both pieces). I used the height of the raglan seam and the lower curve of this seam to draw a new armhole curve. The part of the curve that will be smocked is now on the straight of grain. The depth of this armhole looks much smaller than the Burda pattern. This is O.K., the manipulation of the fabric will give plenty of room for the arm.
 

Here you can see the difference between the 2 pieces. The shaded area will be cut out. You can see that there is a lot more fabric in the bodice region.
 
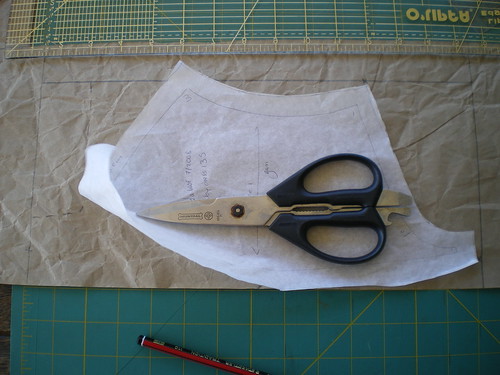
I have done the same thing to the sleeve piece. The armhole curve used is the same as that I used at the front.

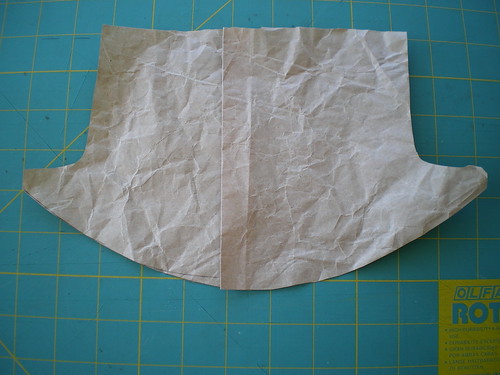
Because the sleeve is an angel wing shape, I have kept a curved hem here. I drew a new curve after straightening the neckline grain as shown in the first sleeve photograph. In a batiste, the sleeve would still form a wing with a straight hem, as the fabric is light, and the pleats can hold it out, but I think the quilting cotton may need a bit of extra insurance to avoid drooping. After I have constructed my version of the dress, I will consider whether the dress hem needs a curve or not. At this point, I tend to think not.

I actually took these photographs of the size 1 Burda dress, thinking I could spread these dresses amongst my nieces, but then realized that I should make another size 3 months dress to provide a more clear comparison. I repeated these steps for the size 3 month pattern. These pieces are smaller. However, after making the new pattern (The back of the new pattern is the same as the front, except for adding an extra inch for the button placket). I measured the neckline template and compared it to the new width of the pattern. It was now over 3x the width, which is more than I need for the smocking. I removed 3 inches from the width of the front and the back pattern pieces, and 1 inch from the sleeve pattern pieces. Fortuitously, this means that I now only need the length of the dress + the length of the sleeve for the size 3 month dress, as I can now fit both front and back pattern pieces on a 114cm standard width of quilting cotton.
Posted by Picasa

As I have now added this post to the tutorial link on my side bar, you may be interested to see both the dress I made using the Burda pattern and the version made using the alterations I have outlined in the tutorials

Friday, 1 August 2008

A smocking disaster waiting to happen

I love smocking, have, over the last 12 years or so smocked at least a hundred garments, but I have never had an in-person lesson. I learnt from magazines and books. I have read a lot about smocking and embroidery, have received favourable critiques of my work from Show judges, and the Smocking arts guild of America, but I make no claims to formal training. I am saying this because I am about to get on my soap box!
 
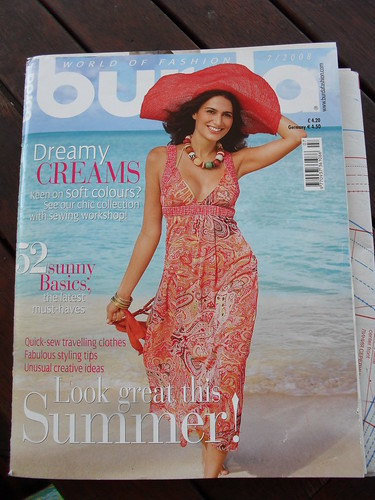
This baby dress is from Burda World of Fashion, July 2008, number 135. It is a special designer feature of the childrenswear shop Jacardi. The pattern uses English style smocking, where the fabric is gathered into regular pleats, then geometric stitches are applied to manipulate these pre formed pleats.
When I first saw this, aside from being pleased for some beginner, I had little interest in this pattern, I thought, a nice easy baby bishop for someone who wants to try smocking, lovely. I have many beautiful and complex smocking projects on my list, this is not the sort of thing I am smocking at this point. However, out of interest in my smocking hobby, and in case this dress used something new to me, I looked at the instructions and the line drawing. I was horrified.
 
In these two photographs, even I will admit that this dress looks OK. In fact, I will probably give it to my niece, but I believe that if a beginner had attempted this pattern, with the Burda instructions, they would be put off smocking for life. I have made this dress solely so that I can write a scathing review of it, and hopefully save an almost smocker from a project designed to fail.
The first thing I want to point out, is that the instructions for the smocking stitches themselves are not just scanty, but incorrect. There may be a translation issue, but a backstitch is not the same as the cable stitch used at the top and bottom of each wave. A backstitch will give you a completely unstretchable stitch, and prevent you from shaping the neck. If you use a backstitch, as Burda advises, your dress will be toast.
The instructions for what appears to be a 5 step wave pattern are the worst smocking instructions I have ever seen. I know I am spoilt with Australian Smocking and Embroidery and Sew Beautiful magazines, so I also looked at the instructions for smocking in an Australian Stitches article, a Handmade magazine project (in less space than used by Burda), a McCalls sewing book, a Vogue and a Simplicity printed pattern and a 1930's pamphlet with no diagram. These Burda instructions were still the worst by far. However, you may be able to follow most of the steps and end up with something approximating a trellis section, but Burda has completely missed the cable at the bottom of the wave before changing direction. If you get this far and follow Burda's instructions, your dress will be toast.
What I have used, is what I think Burda meant, a wave pattern, with a second wave pattern .25 cm above, along each gathering line. Looking with my magnifying glass, the dress in the magazine seems to use a 5 step wave. This was far too stretched out on the size 3 month version I have used, so I substituted a 4 step wave for a similar appearance.
This is a really simple stitch pattern, called wave, trellis, travelling zig-zag and various other names as it is so commonly used. There are good instructions for this pattern all over the internet. index to smocking stitches,4 step wave pattern are just two I found with a google search.
Unfortunately, the awful smocking stitch instructions are not the worst issue with this dress. Basically the smocking has been used solely as adornment. The gathering and elastic properties of the smocking have not been used in the design of the pattern, and in fact work against the dress design, making both the smocking and the garment construction uneccesarily difficult.
 
Here you can see some of the problems. The pleats at the sleeve seams are shapeless and bubbling. This is not the fault of the smocker, but of the pattern. The pleats in this region cannot be on grain, as the cut of the dress prevents this. You can also see the messiness of the pleats in the neckline seam. Despite careful stitching, using the pattern and construction instructions given in the magazine, this was an inevitable result. You may also be able to see that the pleats are very widely spaced at the lower line of smocking stitches. I have given the pleats plenty of slack, but this dress will tend to have a "turtle neck" and be poorly shaped on the baby unless the neck is stretched out after each wash. This is not the sort of thing for which you want to make a new mother responsible!
 
Here you can see how wide this dress is at the hem. I think this may be overpowering on a 3 month old baby. The thing that really annoys me about the width of the hem, is that although there is not enough fabric width at the neck and sleeves to give nice close pleats, the dress is an a-line, with much more fabric width at the hem than at the bodice. It looks as if the designer added the skimpiest amount of fabric to the bodice, to almost allow for the pleats, but didn't realize that this would also make the hem wider, and that the further hem width added by the a line cut could have been transferred to the bodice without making the dress this oversized.
I have several other issues with #135, for instance, the instructions for the sleeve seams confuse "neck" with "side seam", the under arm finish is messy, but these are not project destroying issues.
Today, I redrew this pattern to the way I think it should be. I have a lot of bishop patterns, so I really don't need to do this,as I am sure any of the patterns I own will be better than Burda's, but I will make up a dress from this redraw, and see if I know what I am talking about!
Posted by Picasa