Showing posts with label smocking. Show all posts

Saturday, 4 June 2022

Reconstruction: Linen dress not quite as good as the original garment, but much more useful


 Doesn't the Lady Grey Colette coat adaptation look lovely under the Jacaranda in this photo? I was half pleased with myself when I made this (ulp) 11 or so years ago, and I had a very interesting and in retrospect, enjoyable time making it, albiet with some slightly burdensome fitting woes.

However, I have never worn it, other than in the photo shoot. A very poor outcome for some lovely linen fabric and a lot of work. It has languished in my wardrobe, because frankly, it is the wrong type of garment for the subtropical climate where I live. It is too hot for autumn and spring, being fully lined with Imperial batiste,  ridiculously too hot for summer, and not warm enough for our very brief, but chilly, winter mornings and evenings. Despite this, I had great difficulty in setting scissors to it, despite several attempts over the past few years. I become attached to my projects.

2022, I decided, was time to Woman up and do something about this.

Naturally, I stuffed this up fairly spectacularly.


I used an op-shop find pattern, Kwik Sew 2255 as a starting point for the planned transformation from shoulder line princess double breasted coat to princess line frock.

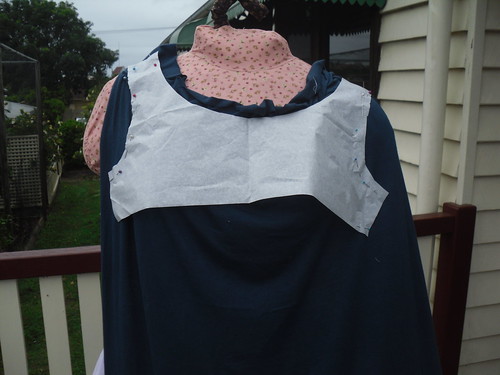
 I had never used this pattern, but for some strange reason, did not make a toile, despite nearly always having to adjust patterns. Instead, maybe thinking that I only needed the general shape of the neckline, I merely traced out the front  and back bodice pattern pieces and merrily chopped away at the front of the coat to approximate the top edges of the front and back bodice pattern. I clearly need to go back to first principles with my sewing, because when I held up the massacred garment to myself, the neckline was unable to cover the salient sections of my bra.

You may have guessed that this experience did not encourage me to go forward with the project. In fact I think the coat  spent more than 3 months lying on my sewing table whilst I moved on to more immediately gratifying projects. 

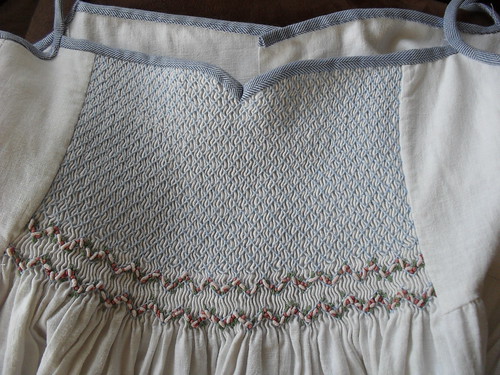
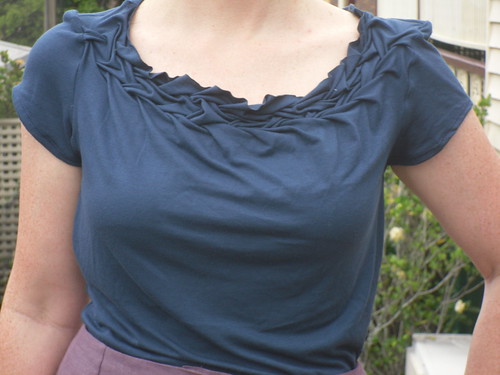
However, after I'd made a few little smocked baby garments, my not-very-latent smocking addiction was looking for new targets. I thought that a smocked insert would satisfy my embroidery urges, and possibly rescue the garment from the too-depressing-to-finish pile. ( This pile usually finds it way fairly quickly to the rag bag, but the beautiful linen was resisting this move).

The smocking was great fun. I did show some embellishment restraint, and smocked the fabric in the closest shade of DMC stranded embroidery thread that I could find for some pretense at subtlety.

 I then had to work out how to attach these smocked sections to the neckline. 

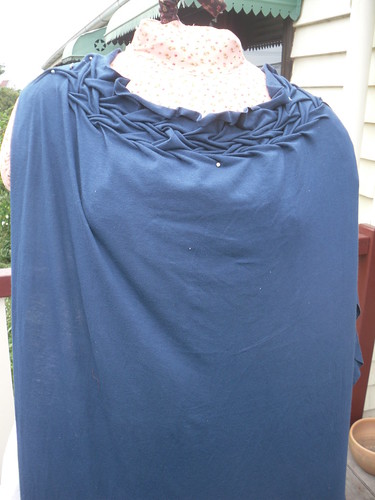
 I carefully hand basted, then machine stitched the smocked sections to fill in the bodice, serenditously finding that I could slightly gather the top edge using the holding stitches from the pleating to encourage the neckline to sit nicely against the body. This was a little fiddly, but I was pleased with the end result.I then attached the back piece of the dress, and piped the neckline for stability.


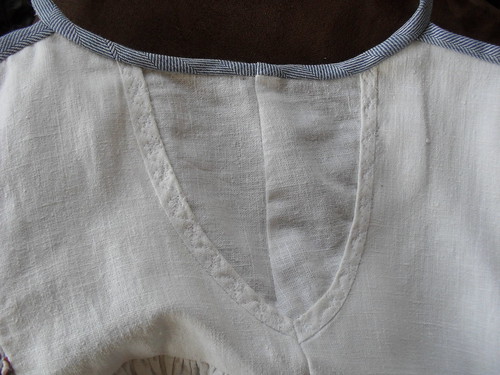
Originally I had intended to keep the coat lining, and make a lined dress, but decided that this made the dress too warm to wear. Instead I drafted a deep facing from the original collar of the dress. This facing extends down the entire front of the dress, and I was able to reuse the interfacing from the coat for this purpose. I bound the facing with a constrast bias binding, as there were not enough scraps from the coat to make a self fabric trim.The only trouble with removing the lining is that I was unable to improve the seam finishing for the back seam of the coat, which orginially was pinked, then topstitched. The photograph was taken after I had worn and washed the dress, and some fraying is occurring.

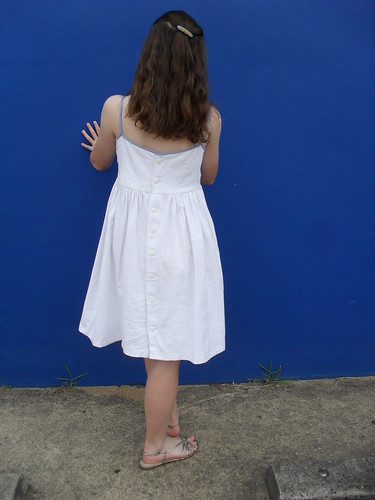
I shortened the sleeves of the dress, mended the unavoidable left over buttonhole from the double breasted coat fastening at the waistline, and found some suitable buttons from my stash.

On starting to make buttonholes I realised that my forward planning skills have become very rusty. The smocked section is thick, mobile, and not suitable for a buttonhole. Oops.

I made a thread loop, oversewn with buttonhole stitch, and this works quite well for fastening the very top of the bodice.

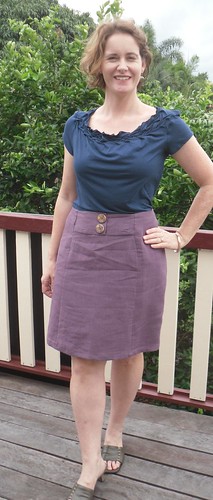
The dress is not as well constructed as the coat, and despite my best intentions I cannot stop noticing the mended waistline buttonhole,  but I feel very comfortable (and thrifty) in this dress and  have already worn it multiple times.
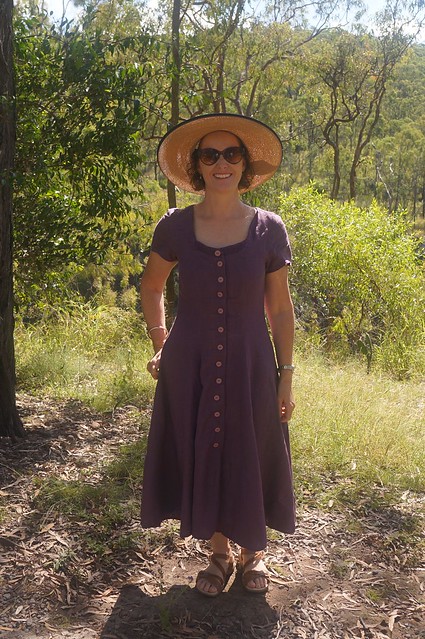


Now I am feeling inspired to make something impractical and frivolous.


Sunday, 13 February 2022

First Birthday dress

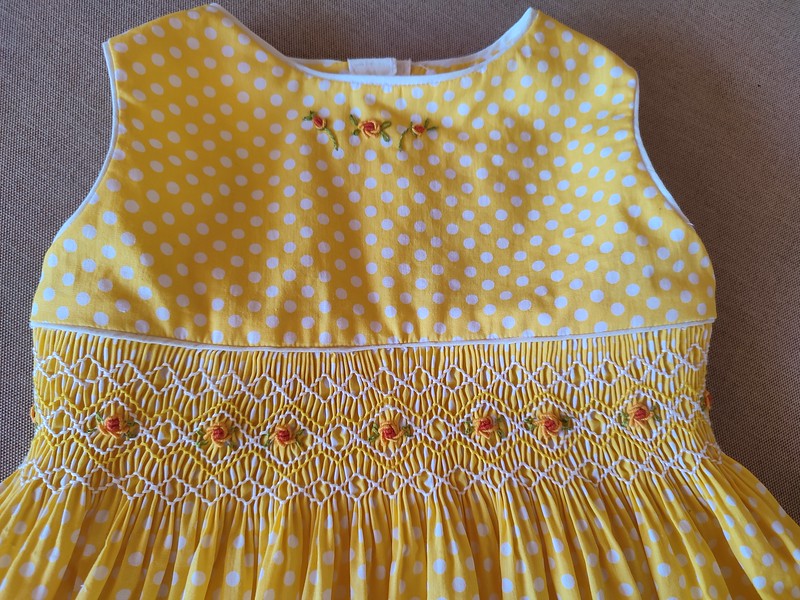
 This has been a highly enjoyable project. My friend bought some fabric for me, and asked me to make a birthday dress for her beautiful little girl. I may have hinted quite strongly that I would like to do this.


The pattern I used was a conglomeration of the romper Lollipop (Australian Smocking and Embroidery 72) and the dress Serious Fun (Australian Smocking and Embroidery 87). I should probably say that it was a simplification of the two patterns as really, the fabric and the smocking do the talking here. Basically this is a sleeveless square yoke dress with a contrast back button band and hem ruffle. The mini piping at neckline, armscyes and bodice, and the neckline embroidery are my own addition.
The smocking design is a modification of the smocking and embroidery from the Lollipop pattern.


My friend has a terrific eye for colour, but is not experienced in buying fabric. Unfortunately she was sold some rather off grain printed cotton, which required a lot of starch to line up nicely through the pleating tool. I think it turned out quite well despite this wrestling, and the recepient seemed quite comfortable on the day by all reports (Alas, I was in isolation and could not attend the party to view the dress in action, but daughter-the-second took some photographs for me) My daughter cunningly managed to gain the photographs before the consumption of cake and before the water play in the rain and puddles. As I reassured the baby's parents, smocking is very robust and a smocked cotton dress has no trouble going through the washing machine, even if you forget to turn it inside out.


Underneath the dress, there is a pair of ruffly bloomers, made from the white cotton also used for the dress ruffle, but with the ruffles made from the yellow polkadot print, edged with white binding. I modified the overall pattern that I had  used for her previously:  Burda Style 02/2016/141 to make these)  Naturally one should not photograph a young lady's underpinnings in situ, (well, I forgot to photograph them before they were provided to the birthday girl), but I assure you that they look very sweet, and could possibly turn into shorts in their next wearing, which one could photograph with impunity. I will keep an eye out for photo opportunities. Both the dress and the rompers were made for size 1, but as you can see, the dress has a little room for growth, which is an advantage for baby clothes. The romper elastic at the waist had to be shortened by about 5 cm to fit.

technical drawing from Burdastyle.com


I love sewing little girl's clothes.

Saturday, 21 July 2012

Slow sewing, High Stakes sewing

Thank you for your kind comments about scrappy sewing. I have moved on to high consumption, low progress sewing instead. I have agreed to make my daughter a formal dress for her year 12 graduation dinner-dance. Actually, she just assumed that I would make it, which was a pretty fair assumption.
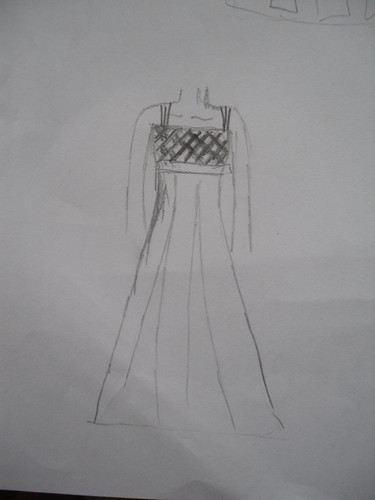
I have a sketch.(by my daughter)
SDC10109
I have fabric, selected by my daughter.
SAM_1098
(The green silk duchess satin)
I have instructions - it must include lattice smocking at the bodice, have a full skirt, be fitted at the waist, and include no horizontal seam at the waist.
I need to franken a pattern.
I have, my daughter tells me tonight, 75 days left to finish this dress, and I started 2 weeks ago. So far there are 15 hours of work in this project, most of it in the smocking, and there is very little visual progress (thanks Andrea of Fabric Epiphanies, for this useful term).
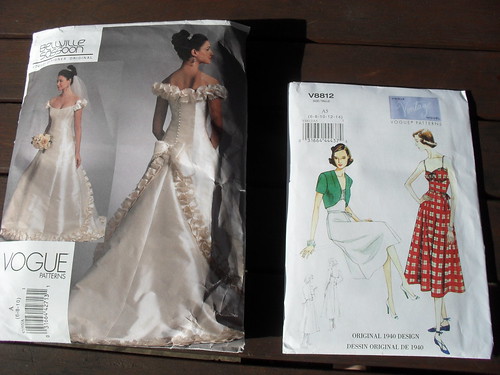
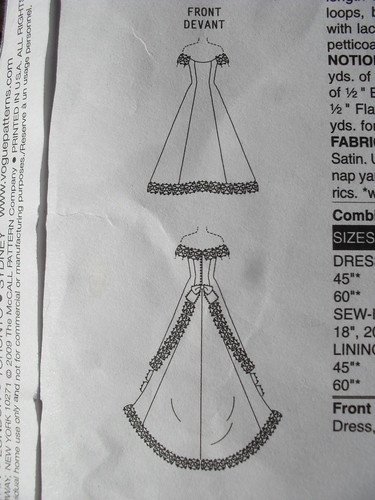
These are the patterns we have chosen for frankening purposes.
SAM_1530
I made a toile of the Belville Sasson pattern- without the train ;)
SAM_1527
The gown has a built in foundation corselet, which is what we really wanted from the pattern, and have done considerable fitting work on this corselet, which will sit under the lattice smocked upper bodice.
SAM_1538
I have not tried it with the boning yet, which on further reading may be a major fitting error requiring starting from scratch, but I am optomistic at this point. I have some stiff silk, maybe Matka?or a thick Duponi? with only a few small slubs, originally bought by my grandmother for silk painting, which I think will be the right texture and hand for this type of under structure. This corselet section is project part A. The rest of the outer dress toile is Project part C, currently on hold.

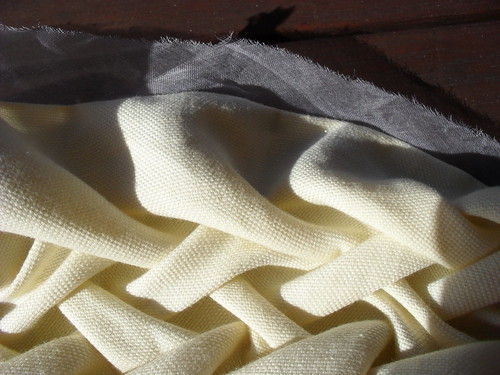
Project part B is the outer upper bodice. I have done some lattice smocking on Irish linen, which has a similar bulk and drape to the silk satin. I have tried some experimental edge finishing - machine rolled hem alone vs rolled hem with raw edged bias organza trim,  and a half lattice smocked edge vs smocking finishing one inch from the hem to allow a more flowing  ruffle edge.
SAM_1516
SAM_1515
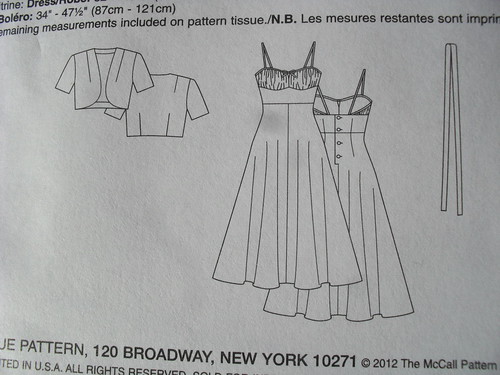
My plan is to use this smocking for a sundress, similar the Vintage reproduction Vogue pattern,
SAM_1522to trial draping the upper bodice and attaching the smocked fabric to the unsmocked fabric  before  I ruin  I use my limited silk satin.
This will be slow, but I am enjoying the process - so far.

Making someone else's dream dress is a project with some intrinsic difficulties

Sunday, 4 December 2011

Refashioned sundress.

I am a happy seamstress this evening.
See what I made today, well, partly made today.
SAM_0193
See how horrid it was before, and how much my daughters despised it
(that is daughter the second reluctantly agreeing to wear this dress briefly)

Before Photo
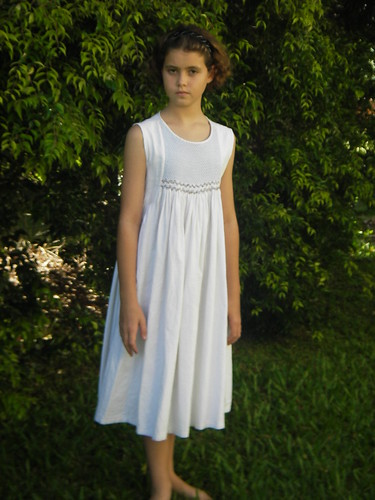
Review of original pattern, White Linen, from Australian Smocking and Embroidery Issue 23, which was the only pattern I have made from this magazine that was a complete and utter disaster.
I liked the smocking and embroidery, and the rather expensive white linen I used to make this dress orginally, which is why I have held on to it for the past 8 years.
The main problem with this dress was that it was way too big for an 8 year old, and also that the bottom of the smocking did not line up with the waistline.
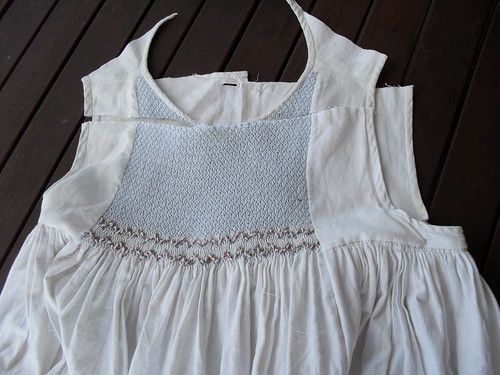
First I unpicked the waistline, and re-sewed it to be level with the bottom of the smocking.
SAM_0154
Next I chopped off the shoulders, and held the dress up to my daughter. Amazingly, I still had to chop off 5cm, front and back, from each side seam starting at the curve of the armholes. I think the original pattern was a tad oversized.
After doing this, I had plenty of fabric from the skirt to use to fill in the armhole.
SAM_0163
I machine embroidered over the original armscye binding, and added a new bodice and armscye binding from a blue and white herringbone twill cotton that is about the same weight as the linen.
At this point, my daughter and I both felt that the dress looked more 6 year old than 16, but she wanted the dress to stay loose at the waist, for coolness.
SAM_0165
I altered the front neckline to a sweetheart shape, and the back to a shallow v, and took the skirt up to just above the knee.
SAM_0172
Somehow this transformed the dress to an instant favourite.
This sort of success could almost make me change my mind about alterations

Sunday, 13 November 2011

Niece November #1 _ 128 Chery Williams Basic Square Yoke, lap 2 of endurance gift sewing

The birthday dress (niece turning 7) is finished in the nick of time.
SAM_0091
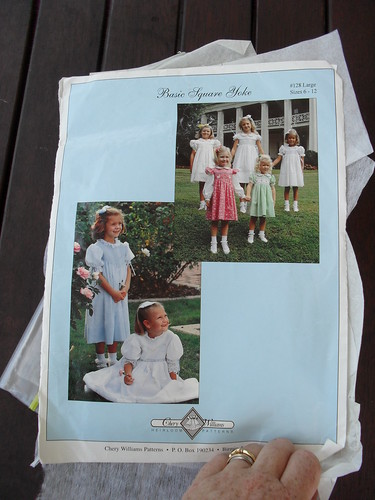
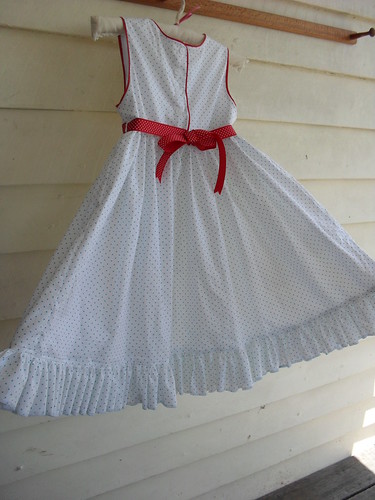
I used, Chery Williams Basic Square Yoke #128, copyright 1994, updated from a mid 80's version, which I own in both the small and large versions.
SAM_0088
There are 10 variations of the pattern on the instruction sheet, but I have used a different variation of my own devising.
SAM_0084
This is a very simple dress, with a lined bodice, darted at the waist, and the neckline and armscye re-cut for a sleeveless version.
SAM_0082
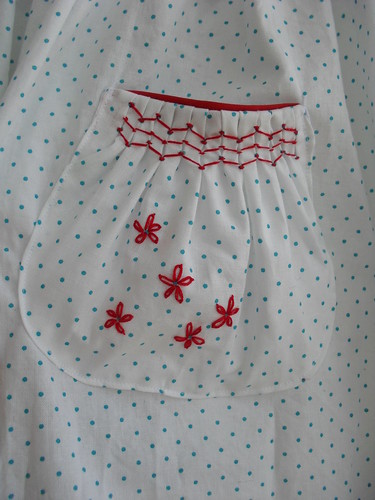
I have piped the neckline, back opening and armscyes, and added an embroidered (lazy daisies) and counterchange smocked pocket.

SAM_0083
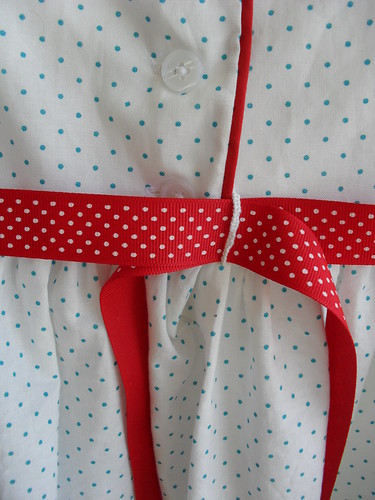
The ribbon sash is held with thread keepers at the side seams, and also at the centre back, where in my experience, little girls' sashes tend to sag.
SAM_0087
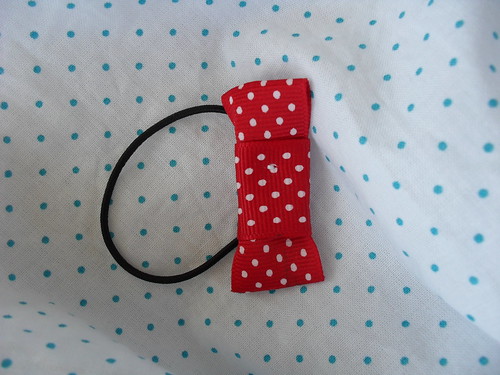
Being unfashionably fond of matchy-matchy, I have also made a hair ornament from the same ribbon as the sash. She is free to wear this with a completely different outfit instead, but it makes me happy ;)

I have added a ruffle to the hem, over 6m long for proper twirl factor, after shortening the dress . All the ruffling has been done using my hand cranked Singer with ruffler attachment, something I wish I had purchased at the same time as the pattern. The ruffler made it very easy to make the essential twirl and sticky-out factor petticoat (cotton batiste), no pattern used, just 2 ruffled tiers, the first is 2 fabric widths, the second is 4 fabric widths, attached to rectangle with an elastic waistband.
SAM_0086
I have used this dress pattern at least 50 times. Whilst thinking about the 2012 SWAP, which is about developing TNT patterns, I thought about the TNTs I already own, and decided this one would have to be the top of my list (although the Jalie sweetheart top might be challenging it shortly). Using this pattern makes me feel nostaglic for my past sewing.

Here is the third dress made from this pattern, and the first time I used it for a birthday dress.

SAM_0089

and here is the first dress (yellow one) and about the 15th dress.
SAM_0090
You can see why I am grateful for niece sewing, all that girly sewing becomes addictive after too much exposure. Be warned.

Thursday, 23 June 2011

Lattice smocked t shirt, the winter version

Last summer, I made some t shirts from knit fabric which I had smocked, using Counterchange/North American smocking. I was very pleased with them, and wore them frequently. The best thing about them was that I was able to use up some of the very thin and clingy knits that I had bought over the internet, thinking they were more robust than was the case.
Due to overwhelming demand (well, one or two half hearted requests) I wrote a tutorial post for the smocking. This so exhausted my enthusiasm for counter change smocking that I left the smocked fabric I had made for the tutorial abandoned in my too hard pile instead of making the intended evening top to wear to a New Years Eve party.
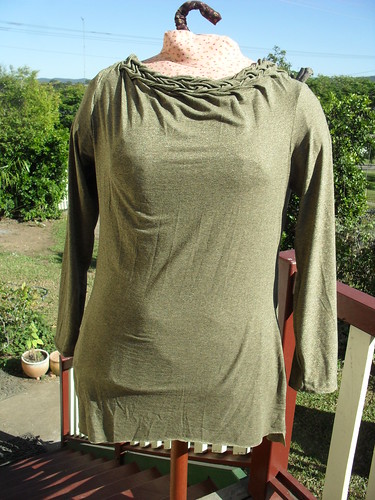
I have a hectic social life, which mainly revolves around driving my daughters to their friends' houses. Nevertheless, I need an evening top by Saturday. My sparkly gold knit rayon with lycra knit from Gorgeous Fabrics seemed just the thing, particularly as I had already done half the work.

This time, I wanted the smocking to be on both the front and the back of the t shirt.
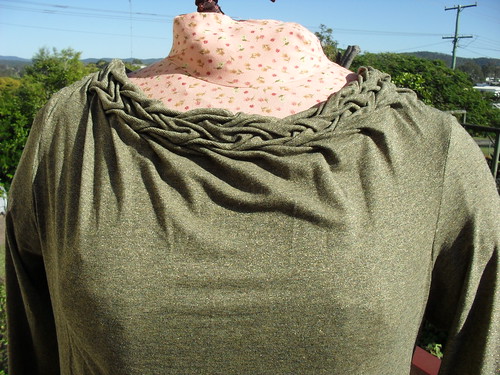
I had smocked further from the border of the fabric, so that I could use the unsmocked edge as a facing.
SDC10162

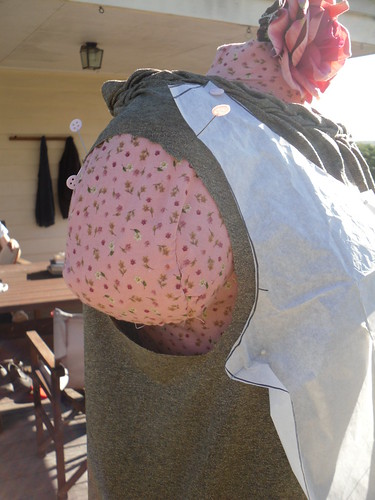
I draped the smocked edge around my dressform, and holding my breath, cut out an armhole at the right side, after pinning the pattern piece to the front for approximate placement (the pattern is t shirt 112 from Burda Style 08-2010).

SDC10164

I marked the shoulders with pins, then lay the fabric flat and cut out the side seams and left armscye following the pattern and my original cutting.

I then returned the pieces to the dressform, and hand sewed the left shoulder seam across the smocking whilst the pieces were draped on the dressform. I sewed the remainder of the shoulder seam by machine. I used the walking foot, 3 step zig-zag at 1.0mm width and length, and a size 60 stretch needle. Sewing this fabric was still rather difficult, due to its incredible stretchiness, and tissue-like thickness.

SAM_0555
Front
SAM_0556

As the fabric is so thin, I had cut out another layer of the fabric for the fronts and backs, intending to use this as an underlayer, and to sew the facing to the underlayer to keep the neckline in place. However, once I had sewn in the sleeves (one is inside out and backwards - the price of mid-week evening sewing, but I am not unpicking this fabric!) and tried on the t shirt, it seemed that the incredible stretchiness had made the t shirt around 8 sizes larger than the last time I used this pattern. (I am very glad that I orginally intended this t shirt to have a very high neckline). This new oversized style removed a lot of the clingy potential about which I was concerned, so now I also have a stretchy gold singlet that might be the base for this years New Year party oufit as well as this winter evening top. There is nothing like planning ahead ;)

I tacked the facing at the necklines to the outer fabric at some of the gathering points at the smocking, so that it is not visible from the outside.

SAM_0557
Back
SAM_0558

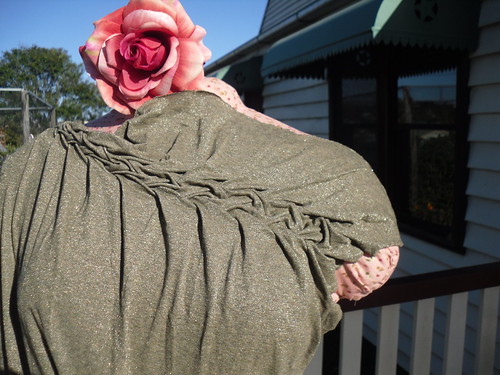
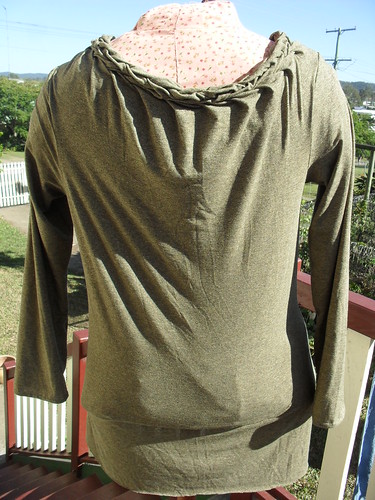
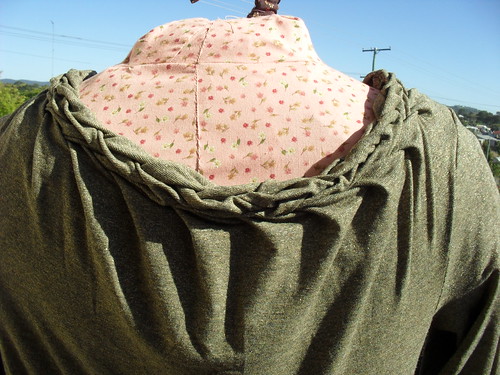
The back has a cowl effect that I quite like.

SAM_0559

I finished the sleeve hems by hand, using catch-stitch, as I wanted a very narrow hem and did not trust this fabric under the coverstitch. I did not finish the hem at the body, as the top is almost dress length, but I will be wearing it tucked in. It is now an evening top with built in petticoat!

Friday, 3 December 2010

Lattice smocking on a t shirt Burda style 08-2010

I have made several of these t shirts, does this make it a TNT? Anyway, after thinking this super soft and clingy bamboo viscose jersey from Gorgeous fabrics was only useful for super soft and comfy knickers ( which I make, but tend not to expose on my blog for some Victorian reason of reticence), I have to eat my words. I love, love, love this t shirt with lattice smocking on this super soft fabric(North American smocking, or counter change smocking - lattice pattern - sources Threads Magazine 2010, Australian smocking and Embroidery magazine 2009, smocks and smocking published 1972 - etc etc)
SDC10095
The last time I smocked a t shirt I used the traditional English Smocking method of applying the smocking to the pattern - lying the pattern piece over the smocking and cutting it out, on grain.
I have worn this t shirt frequently, and it is one of those garments that other people notice, and comment about favourably. Naturally this meant that I was inspired to make another one. :)

This time, I felt that a less traditional method would be appropriate, which really means that I did not want to smock 8- 10 rows before cutting out. I smocked two rows of horizontal, rather than vertical lattice smocking,using a one inch grid, then draped the neckline using my dress form, Genevieve, to achieve a pleasing fall of fabric.
SDC10075
Not trusting this draping at all, I overlocked the upper portion of the bodice to an on -grain stay, cut from the same fabric, cut out using the pattern piece photographed here.
SDC10076
It took about 10 minutes to sew the rest of this t shirt.
SDC10078
Getting out the overlocker and the coverstitch machine is hardly worth it for one garment, so I whipped up a t shirt Vogue 2925 (oop) from a more stable cotton-lycra knit.
SDC10110
20 minutes max. I love tested t shirt patterns.
It looks better with the scarf that my mum gave me,
SDC10115
but this sort of sewing is sooo much faster and more satisfying than shopping. It's a pity I prefer fiddly sewing with wovens.

Sunday, 30 November 2008

Australian Smocking & Embroidery Issue 83 "Fairy Floss"

I am still unearthing UFOs. I could not think why I had not finished this romper, but when I looked back at my blog realised that I had started 4 projects in one weekend near the end of winter. This was not a good idea! Unfortunately, this meant that I missed the very small winter garment window for the niece I intended to dress in this garment. I had cut out the pattern, sewed the centre seams, and naturally, completed the bit in which I was really interested - the smocking. After this, the romper somehow drifted to the bottom of my sewing pile.
 

The garment in the magazine is made from cotton velour. I love velour baby clothes, but had never seen cotton stretch velour fabric for sale in Australia before it appeared at the Country Bumpkin shop in this issue. It was available in pale pink, for $19.95 per metre. I was tempted, but decided that pale pink was not a suitable colour for rompers worn by a crawling/almost walking baby, and substituted a synthetic velour, which just happened to still be in my stash after making new born clothes whilst expecting my son (now 6). He did wear purple as a newborn, but my husband felt that purple was insufficiently blokey for a male Australian baby, so I did not use the remainder of the fabric - there was only enough for a baby garment.
 

I enjoyed making this, but ran into a few issues. My first concern is the smocking. I have used my own smocking design, as there was only a tiny amount of smocking on the magazine garment, with most of the embellishment being ribbon and bullion roses. I now know why. The smocking does not show up well on the plush fabric, and because fibres of the plush poke up between threads, the smocking looks a bit scanty and uneven. I used 3 strands of DMC cotton, but should have used 4. I don't think I will smock on velour again, but it was an interesting experiment. My choice of lazy daisies and chain stitch was also not ideal. The bullion stitches used on the magazine garment show up much better. I should have used 3 dimensional embroidery for the flowers.
The second issue was the garment style. I do not know many immobile 12 month old babies, and this pattern has non grip feet included in all sizes, including the 12 month size I have made. I don't think this is a good idea for any standing or walking baby in anything other than pyjamas. I eliminated the feet.
The construction of this garment did not seem to take into account the knit nature of the fabric. Piping was used where it would limit the stretch inappropriately IMO. I did use it at the front bodice, but did not like the look of it, so sewed another few mm outside the seam allowance to make it very skinny and unobtrusive, then did not use it anywhere else. I also removed some of the sleeve fullness, as I felt the sleeves were too bulky. I did not include the collar, as I ran out of fabric. I hope the neck is not too wide. The romper is very large for size 12 months IMO, I hope it is not too big for the intended recipient, but I suppose she is not getting any smaller.

As the romper will not fit any of my nieces during winter, I had to look further afield for someone to wear the garment. Rashly, I offered it to a baby whose mother sews. I had not constructed the garment when I made the offer, so of course everything that could go wrong with the construction occurred. I am not going to point out the defects, but I know they will be glaringly obvious to a sewing mum. Now I want to make her something else, just to show that I can do it properly!
Posted by Picasa