Showing posts with label 6pacMay-July 14. Show all posts

Tuesday, 10 June 2014

Wardrobe balance + BWOF 01-2008-107 shirt, self drafted trousers

Me-made-May seems to have a subtitle in the reflection posts. Is what you sew, what you wear? I wear what I sew, but unfortunately, at times, this is boring in the sewing phase. It is a bad thing when you find your own blog and your favourite hobby rather dull. I hope this will pass! I am keeping it real. Sewing is not just pretty things for self (or daughter) adornment. Wardrobe building is not very exciting, but it needs to be done if you are anti fast-fashion or don't fit RTW. How to do it well, without excess expense, and in a minimal number of garments is endlessly interesting in theory. See this thread and its precursors.
I like a blog with shiny new patterns and endless party outfits as much as the next person, but my real life includes lots of clothes for work, exercise outfits for middle aged persons, and t shirts for the conservative 11 year old male. If sewing was just a hobby for me, I could be a dilettante, but fortunately for my budget, sewing has practical aspects around here.
I find it interesting, in the Me-Made-May round ups, that several people have said they have too many clothes, but still find it hard to find things to wear every day. I think Mikhaela sums it up very nicely here. Too many lovely clothes that aren't worn much, and not enough every day clothes that meet practical needs.
Of course, this could mean that we don't dress up enough in everyday life, despite having more options that the non sewing majority.
Clio says that nearly everyone wears a dress to the sewing meet ups,and wonders why. I guess that depends on your climate and lifestyle. I wear dresses for most of the year - but not to work.
Rachel of House of Pinhero says 65% of the clothes she's sewn are dresses.
I think I'll write down what type of clothing I wear the most, and see if I can balance my sewing with my wardrobe needs. This sounds a little like Carolyn's project where she sketched everything she wore for a year (such an organised lady, I'm in awe of her sewing and artistic skills), but I will not be sketching.
Here are more everyday clothes, that I needed a sew-a- long and self persuasion techniques to sew instead of something more interesting.
DSC03437

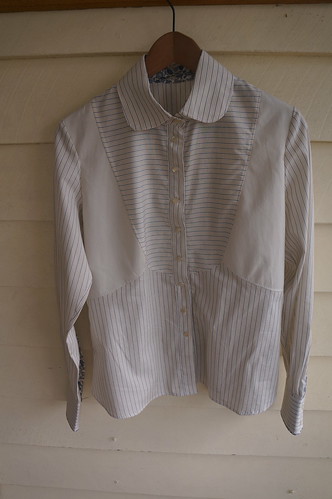
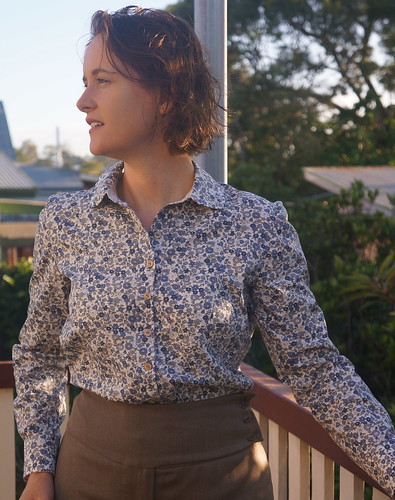
Blouse 01-2008-107 again, in a subdued Mumsy floral - possibly the floral is pushing the professional boundaries at work, floral has so little gravitas, but it is inoffensive. Hopefully the business-like shape of the shirt balances the prettiness.
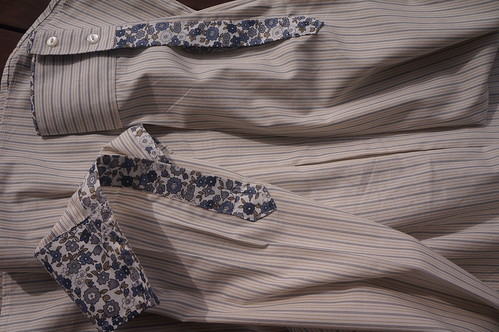
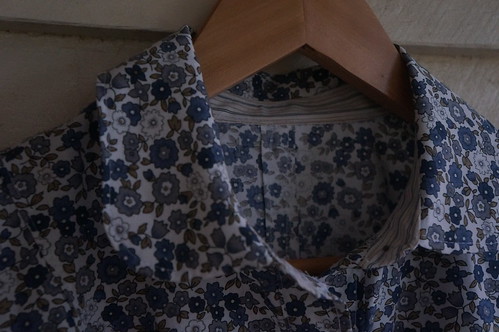
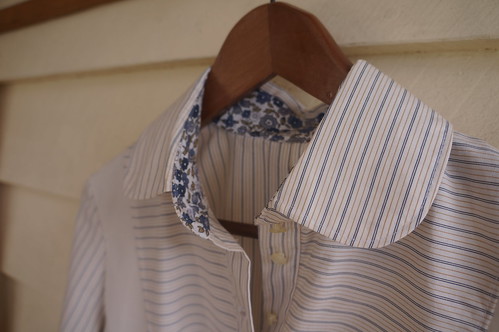
There is some more business-like stripe on the inside of the (narrowed) collar stand and in the cuffs, but there wasn't enough for the plackets.
DSC03438
 Worn with Self drafted Useful trousers for work
Why are work clothes so boring to sew?
I'll like wearing these much better than I would like shopping for  or wearing ill fitting ugly work clothes, I just have to convince myself that this is what I want to make. Really.

Stashbusting statistics: About 1.5m of mid weight cotton woven, provenance forgotten, but a few years old

Sunday, 8 June 2014

Burda World of Fashion 01-2008-107 Bib front blouse

I've grit my teeth and am sticking to my work clothes plan. I rather like the trousers (considering that they are well, trousers), they've done their duty well at work, but photos are lacking, so I shall post about the blouse of multiple fabrics instead.

DSC03407

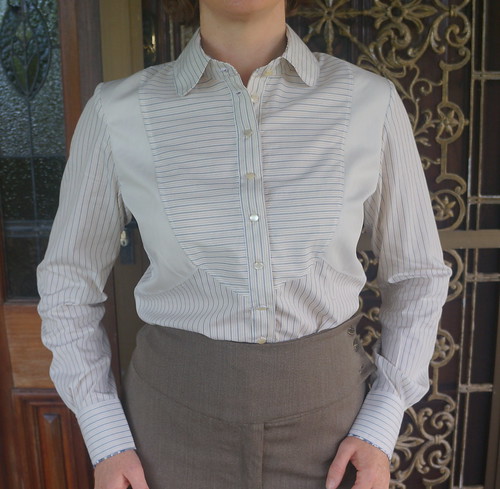
In my typical very - poor - use - of- time in an attempt to be thrifty, I was determined to make some sort of garment from a shirting remnant (man shirt), and thinking of the fabric squeezing possibilities inherent in a blouse with 8 pieces in the front, actually had a workable arrangement for this rather interesting take on a business shirt, Burda Style 01-2008-107.


technical drawing from www.burdafashion.com
 I've made this before (with the collar from 108) using different stripe directions for the front and find the effect quite pleasing. (The FBA method and other alterations I used for this garment are shown at the post about the previous blouse )
Naturally, I needed a little help from another fabric to get a whole blouse from my remnant, but as I often make contrast collar stand, cuffs and plackets, for work shirts, I didn't see this as a problem

Unfortunately, in an unusual burst of enthusiasm for cutting out (usually I make one garment before starting the next one), I was cutting out blouse the first from my 6pac at the same time, and surprisingly having a largish rectangle of my striped shirting cotton left over, I cut out cuffs and collar stand for my cream blouse and patted myself on the back for using up every last piece of the remnant.
I'm sure you can fortell the next stage of this story.
DSC03411
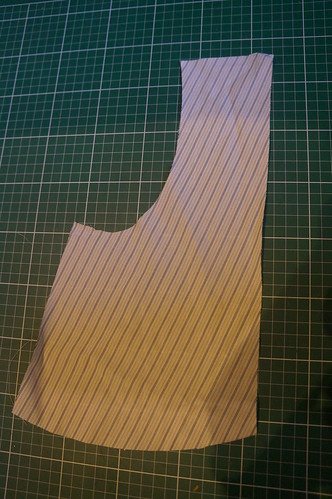
Yes, I had only cut out one of the upper side pieces. This was cut in a single layer, so as to have the stripes in opposite directions for the 2 sides. When I carefully went through casually checked the pieces of the shirt, pinned to their pattern, prior to cutting out my extra cuffs, I failed to notice that there was a singleton.
The partially completed bodice lay around on my sewing table for a few days looking at me mockingly.
I wasn't keen to use the same fabric as the collar and cuffs, this being a bit strong in contrast, but having 3 fabrics in the blouse was making me think that the blouse would read "weekend cheerful and colourful patchwork" rather than "professional with a touch of whimsy".

Eventually, I went with a solid off-white, in a cotton herringbone twill (shirt weight), which has enough of a stripe effect to give me the directional variation I was after.

DSC03409
It is not a disaster, but I'm not sure if I like it as much as my original plan, there is something rather noticeable about it for a work blouse.

DSC03405

My other design changes to the pattern  were to offset the cuffs again, for a line of contrast from the right side, to add more buttons to the front fastening for gaposis resistance, and also an inverted pleat at the back, sewn down at the top and waist, to ensure room for arm movement with minimal untucking.Instead of the complex half chesterfield front with an added tab, (which was fun, looks good but used a lot of fabric and required fiddling) I have used the most simple form of sewn on placket - a long strip folded over, with self fabric as interfacing. I have used a David Page Coffin sleeve placket pattern and instructions from Shirtmaking.

DSC03408

Seams are flatfelled, for garment longevity and inside tidiness to be visible when the sleeves are rolled up, and I have used flat buttons on the cuffs instead of the shank ones at the front, to reduce catching.
It should be very practical and useful, and there is another blouse from the same pattern cut out and ready to go.


Unfortunately I have a sudden urge to sew chiffon and ruffles.

Scrapbusting statistics about 1.3 m of shirting remannt (Global Fabrics, Wellington 2011), and a few cm of 2 other cottons - herringbone twill from Michael's fabrics and unremembered location  for the floral.


Monday, 26 May 2014

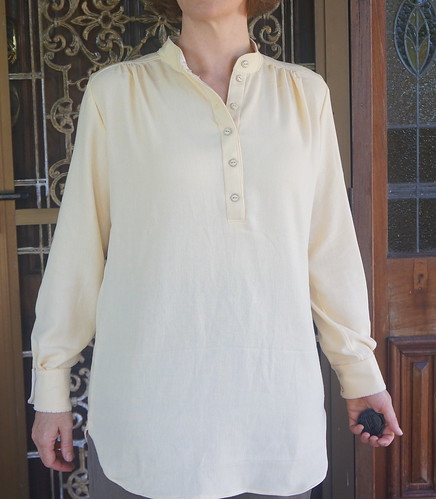
Burda Style 02-2009-120 tunic blouse.

Thank you for the encouraging comments about Project Formal. Unfortunately, I cannot indulge myself with constant evening dress sewing, and have returned to the everyday sewing with my efforts over the weekend.
I am so grateful for sew-a-longs. I have the greatest difficulty in motivating myself to make clothes for work, because my work is not the place for sartorial self expression, and I have to wear trousers. Urgh.
The Fabulous Dr E has a seasonal sew a long of 6 pieces hosted at Stitchers Guild, just perfect for a work wardrobe update.These useful pieces are deadly dull, but will get a lot of wear. I am making 2 pairs of trousers, 3 blouses and a very easy knit fabric cardigan top. Hopefully these will all co-ordinate.

DSC03387

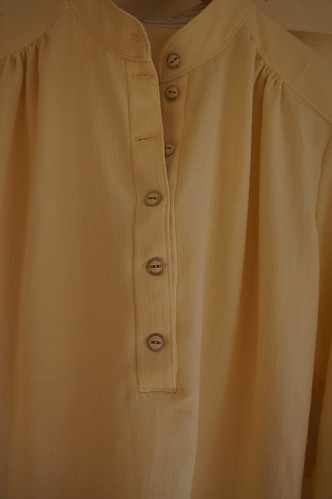
First up is a pattern I haven't tried before, the tunic blouse from February 2009 Burda Style, 120.

technical drawing from http://www.burdafashion.com
 A particularly pleasant aspect about using these older Burdas (aside from my natural tendency to sew clothing that is 5 years or so out of date) is that the pattern sheets have only half the number of patterns on them as the current issues, so they are really easy to trace.
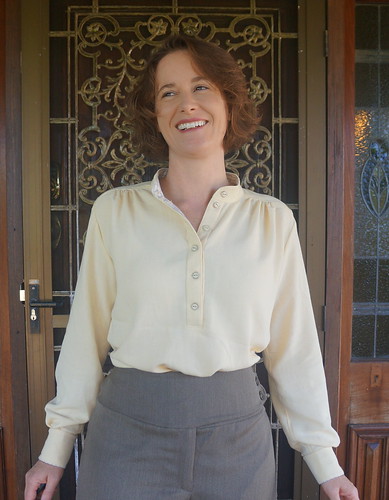
It looks terribly casual in the photo above, but the intention is to wear it tucked in, this untucked photo is to demonstrate the length of the tunic (longer length B). The fabric is from deep stash, pre 2008 Martin & Savage Fabric, from the days when I was experimenting with allegedly breathable polyester woven fabrics for work wear (heavily pushed by Australian Stitches Magazine at the time). This will definitely be a winter only blouse - the weave is soft and loose, and the fabric is quite fine, but my previous experience with this type of fabric is that it is quite warm to wear if you live in the subtropics.
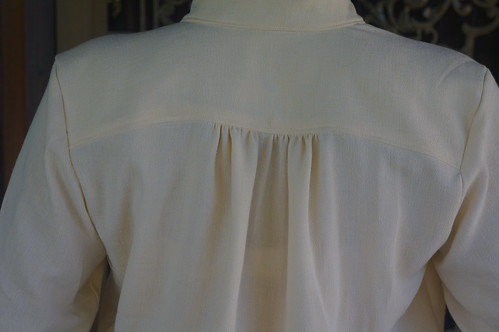
The blouse was nicely drafted, and not tricky to sew, having gathers rather than darts. I did not have to do a FBA, yay, but made my usual square shoulder adjustment, large arm adjustment and also removed 2cm from the shoulder seams as, unusually for me with Burda, the shoulders were too wide. It has gathers at the back too, making it very practical for reaching forward.

DSC03386

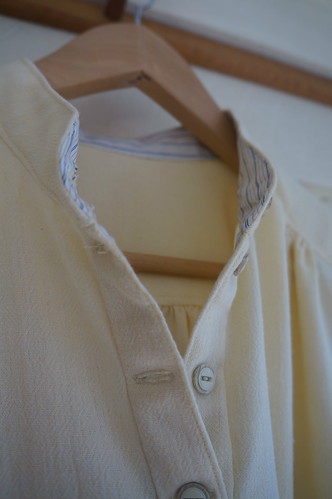
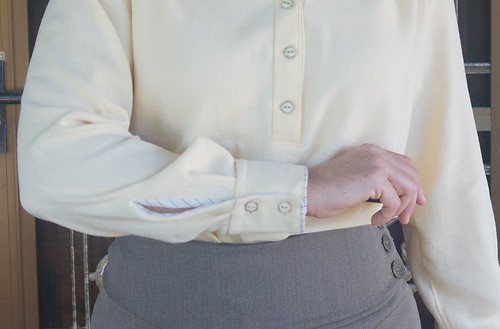
In an attempt to workify this casual looking blouse, I used a shirting fabric for contrast inner placket, inner collar stand and cuffs + binding.

DSC03393

 I offset the cuffs so the stripe shows as a border.
DSC03381
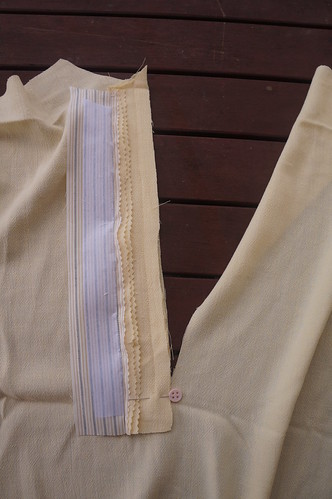
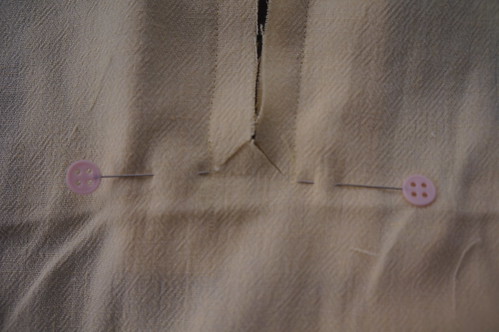
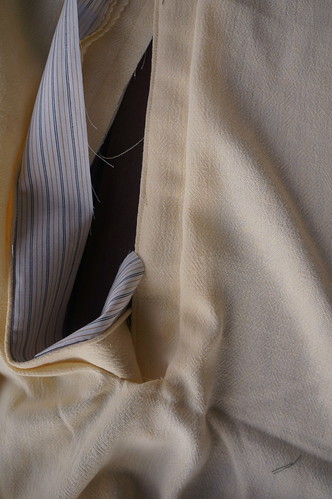
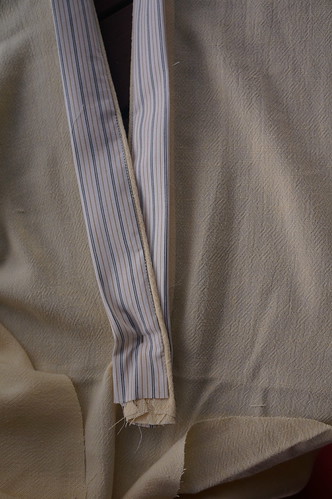
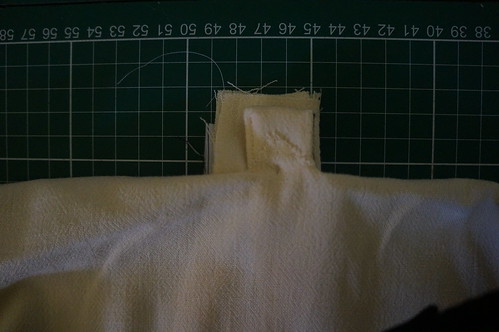
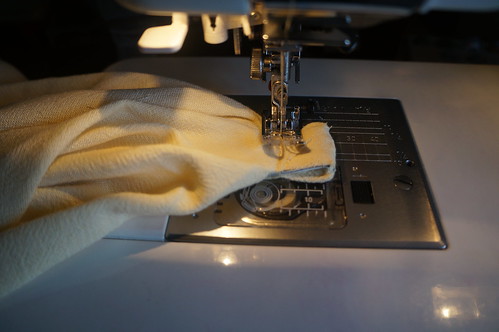
Burda is somewhat terse with the front placket instructions, and the two previous reviewers of this pattern both mentioned this as a difficulty, so I took photographs of this section of the construction.

DSC03349

Cut front opening to within 1cm of the marked line, sew each placket to the front, stopping at the end of the line- ensure sides match.

DSC03350

Cut diagonally into the corners at the base of the front opening (you can sew across between the two vertical seam allowances for reinforcement)

DSC03351

DSC03353

Turn plackets to the inside, laying one over the other, turn seam allowance at base of placket to the inside, making sure the outside of the placket is straight - pin in place

Finish insides of long edges (I handstitched)

DSC03354
Secure seam allowance of bottom edge to plackets (I handstitched)
Finish short edges of placket (I handstitched)
DSC03355
Sew across short edge on the inside, ensuring that seam is straight and that there is no gap where the seam meets the long edge seams

DSC03394

Turn out and topstitch as desired. Make buttonholes and attach buttons after collar stand is finished.

DSC03379

Blouse tucked in for work.

DSC03391

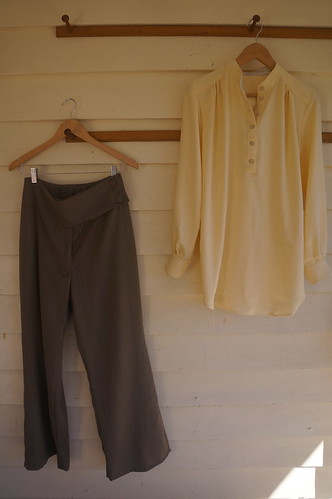
6pac so far
I will report on the trousers later.


 Stashbusting statistics - 1.5m woven polyester - pre 2008. Alas, there is a sizeable piece remaining.